- Table View
- List View
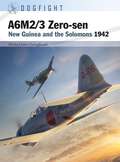
A6M2/3 Zero-sen: New Guinea and the Solomons 1942 (Dogfight #10)
by Mr Michael John ClaringbouldThis book details the exploits of the highly skilled Naval Aviators charged with achieving air supremacy over New Guinea in their A6M2/3 Zero-sens. The combat record of the Zero-sen in New Guinea has mostly been overstated, with little due being given to the constraining conditions under which the fighter operated. The air combats fought over New Guinea in 1942 between Imperial Japanese Naval Air Force (IJNAF) pilots and their Allied counterparts in P-39 Airacobras and P-40 Warhawks were often 'trial and error' affairs, with both belligerents being caught out by weather. This study covers the key role played by governing factors including geography and climatic conditions, and examines the modified tactics employed by IJNAF Zero-sen pilots to help them cope in-theatre through the comprehensive analysis of RAAF, USAAF and Japanese operational after action reports. Using first-hand accounts from both famous aviators and previously unknown RAAF and Japanese pilots, and specially commissioned artwork, leading South Pacific historian and author Michael John Claringbould sheds new light on the air war fought over the wilds of New Guinea during the course of 1942.
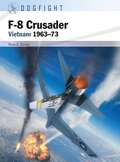
F-8 Crusader: Vietnam 1963–73 (Dogfight #7)
by Peter E. DaviesWith specially commissioned artworks and dynamic combat ribbon diagrams, this volume reveals how the 'last of the gunfighters', as the F-8 was dubbed by its pilots, prevailed against the growing MiG threat of the Vietnamese People's Air Force. When the Vietnam War began, the F-8 was already firmly established as a fighter and reconnaissance aircraft. It entered combat as an escort for Alpha strike packages, braving the anti-aircraft artillery and surface-to-air missiles alongside the A-4 Skyhawk bombers and meeting MiGs for the first time on 3 April 1965. Although the Crusader was nicknamed 'last of the gunfighters', its pilots employed 'secondary' AIM-9D Sidewinder missiles in all but one of their MiG kills, with guns also used as back-up in three. Its 20 mm guns were unreliable as they often jammed during strenuous manoeuvres, although they were responsible for damaging a number of MiGs. However, in combat the F-8 had the highest 'exchange ratio' (kills divided by losses) at six-to-one of any US combat aircraft involved in the Vietnam War. Through the copious use of first-hand accounts, highly detailed battlescene artwork, combat ribbon diagrams and armament views, Osprey's Vietnam air war specialist Peter E. Davies charts the successful career of the F-8 Crusader over Vietnam.
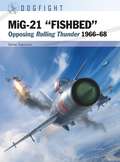
MiG-21 “FISHBED”: Opposing Rolling Thunder 1966–68 (Dogfight #8)
by Dr István ToperczerUsing archival photographs sourced directly from Vietnam, specially commissioned diagrams and combat accounts from veterans, István Toperczer reveals how the MiG-21 defended Vietnam between 1966 and 1968. One of the most successful communist jet fighters ever built, the MiG-21 "Fishbed" was involved in a series of deadly duels with American fighters over North Vietnam as the USAF and US Navy ramped up strike missions during Operation Rolling Thunder, culminating in the destruction of over 70 US aircraft for the loss of 35 "Fishbeds."Having honed their skills on the subsonic MiG-17, pilots of the Vietnam People's Air Force received their first examples of the legendary MiG-21 supersonic fighter in 1966. Soon thrown into combat over North Vietnam, the guided-missile-equipped MiG-21 proved a deadly opponent for the American crews striking at targets deep into communist territory. Although the communist pilots initially struggled to come to terms with the fighter's air search radar and weapons systems, the ceaseless cycle of combat operations quickly honed their skills. The best fighter then available to the VPAF, more than 200 MiG-21s (of various sub-types) were supplied to the North Vietnamese. In this study, leading VPAF authority István Toperczer analyzes the tactics used by the MiG-21 pilots over the bitter fighting in North Vietnam during Rolling Thunder. The highspeed 'hit and run' attacks employed by the communist pilots proved to be very successful, with both R-3S air-to-air missiles and heavy-caliber cannon inflicting a rising toll on American jets. Using first-hand accounts from MiG-21 pilots, battlescene artwork, combat ribbon diagrams, and armament views, the author details the important role played by the "Fishbed" in the defense of North Vietnam.

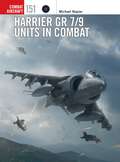
Harrier GR 7/9 Units in Combat (Combat Aircraft #151)
by Michael NapierFormer RAF Tornado pilot Michael Napier chronicles the action-packed history of the Harrier GR 7/9, and its missions in West Africa, the Balkans, the Middle East and Afghanistan over a 14-year period of ceaseless operations. The Harrier GR 7/9 was at the 'tip of the spear' for the RAF when it came to employing weapons against well-equipped standing armies and irregular forces in the 1990s and during the first decade of the new millennium. Assigned to the Harrier GR 7/9 Force, the aircraft undertook No Fly Zone patrols over northern Iraq, supported UN forces in the Balkans and embarked in Royal Navy carriers to bolster the RAF presence ashore in the Arabian Gulf. Harrier GR 7s also flew from HMS Illustrious over Sierra Leone in 2000 and were involved in the second Gulf War during early 2003 acting as Close Air Support for Coalition forces. Using first-hand accounts from his extensive Service contacts, supported by both official and personal photographs and 30 artwork profiles illustrating the wide range of colours worn and ordnance employed by the 'jump jet', Michael Napier provides a rare insider's look at the deployment of Harrier GR 7/9 up to its withdrawal from RAF service in 2010. Moreover, Napier also covers the numerous upgrades received by the aircraft over the years, from more powerful engines to the creation of the GR 9/9A variants in 2005.
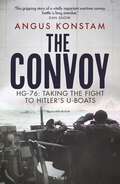
The Convoy: HG-76: Taking the Fight to Hitler's U-boats
by Angus KonstamThe Convoy represents a fresh approach to the story of the Battle of the Atlantic. It is also the first to deal with the more spectacular story of HG-76, a major turning point in the naval war.HG-76 sailed from Gibraltar to Britain in December 1941 and was specially targeted by the Germans. A wolfpack of U-boats was sent against it, and the Luftwaffe was heavily committed too in a rare example of German inter-service cooperation. German intelligence agents in Gibraltar and Spain also knew every detail of HG-76 before it had even sailed, seemingly stacking the odds in favour of the Kriegsmarine. Despite this the convoy fought its way through. Improved radar and sonar gave the convoy's escorts a slight edge over their opponents, while the escort group was led by Commander Walker, an anti-submarine expert who had developed new, aggressive U-boat hunting tactics. Previous Gibraltar convoys had been mauled by Luftwaffe bombers operating from French airfields. This time, though, HG-76 would be accompanied by HMS Audacity, the Royal Navy's first escort carrier – a new type of warship purpose-built to defend convoys from enemy aircraft and U-boats. Following seven days and nights of relentless attack, the horrors of which are brought home through a series of first-hand accounts, the convoy finally reached the safety of a British port for the loss of only two merchant ships. Its arrival was seen as the first real convoy victory of the war. Brought to life by expert naval historian Angus Konstam, The Convoy combines the story of the technical and tactical developments that won the Battle of the Atlantic for the Allies along with a narrative that reveals both the terror and the stubborn determination that defined the experiences of those that served on convoy duties.
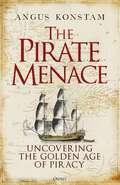
The Pirate Menace: Uncovering the Golden Age of Piracy
by Angus KonstamThis new account explores the most notorious pirates in history and how their rise and fall can be traced back to a single pirate haven, Nassau. Angus Konstam, one of the world's leading pirate experts, has brought his 30 years of research to create the definitive book on the Golden Age of Piracy. Many of the privateers the British had used to prey on French and Spanish shipping during the War of the Spanish Succession turned to piracy. The pirates took over Nassau on the Bahamian island of New Providence and turned it into their own pirate haven, where shady merchants were happy to buy their plunder. It became the hub of a pirate network that included some of the most notorious pirates in history: Blackbeard, 'Calico Jack' Rackam, Charles Vane and Bartholomew Roberts. The growth of piracy led to a major surge in attacks in the Caribbean and along North America's Atlantic seaboard. With the fragile maritime economy of the Americas threatened with collapse, major ports were threatened and trade brought to a standstill, the British government finally declared war on the pirates. The Pirate Menace draws on extensive research, as well as a wide range of first-hand accounts, to produce a new history of the heyday of historical piracy.
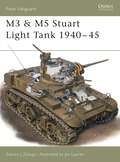
M3 & M5 Stuart Light Tank 1940–45 (New Vanguard)
by Steven J. ZalogaThe M3 and M5 family of light tanks were the culmination of American tank development of the 1930s. By the time of the outbreak of the World War II, they were approaching obsolescence, as tank forces in Europe were shifting from light to medium tanks as the main element of their armored forces. First entering combat in the autumn of 1941 in the Western Desert with the British Army, the Stuart quickly proved its inadequacies. The M3 and M5 light tanks proved more suitable in the Pacific theater than in Europe, and fought successfully in many of the major battles including Guadalcanal, Tarawa and Peleliu. This title narrates this distinctive and unusual fighting vehicle's history.

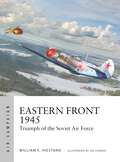
Eastern Front 1945: Triumph of the Soviet Air Force (Air Campaign #42)
by William E. HiestandA detailed, illustrated account of the air campaign that accompanied the Red Army's final push towards Berlin, in which massed Soviet air power defeated the Luftwaffe's high-tech Me 262 jets and Mistel exploding drones. The last months of World War II on the Eastern Front saw a ferocious fight between two very different air forces. Soviet Air Force (VVS) Commander-in-Chief Alexander Novikov assembled 7,500 aircraft in three powerful air armies to support the final assault on Berlin. The Luftwaffe employed some of its most advanced weapons including the Me 262 jet and Mistel remotely-guided bomb aircraft. Using photos, 3D diagrams, maps and battlescene artwork, William E. Hiestand, a military analyst with a longstanding interest in Soviet military history, explains how Germany's use of high-tech weaponry and massed Soviet air assaults was not just the culmination of World War II air combat, but also pointed to how the future rivalry with NATO would play out. The VVS used powerful and flexible air armies to control and employ its huge force of aircraft – organizational and employment concepts that would shape Soviet plans and preparations for combat during the Cold War. For the first time, this volume explains how air power helped win the war on the Eastern Front, and how victory shaped Soviet air power doctrine for the decades to come.
The Blitz 1940–41: The Luftwaffe's biggest strategic bombing campaign (Air Campaign #38)
by Julian HaleAn illustrated history of how the Luftwaffe intended 'the Blitz' to knock Britain out of the war, emphasising the German point of view and detailing how Britain's defences and civilians responded.The Blitz - the German 'blitzkrieg' of Britain's industrial and port cities - was one of the most intensive bombing campaigns of World War II. Cities from London to Glasgow, Belfast to Hull, and Liverpool to Cardiff were targeted in an attempt to destroy Britain's military-industrial facilities and force it out of the war.Most histories of the Blitz concentrate on the civilian experience of 'life under the bombs' or the fighter pilots of the RAF but, in military terms, the Blitz was also the Luftwaffe's biggest and most ambitious strategic bombing campaign. Focusing on both sides, this book places particular emphasis on the hitherto under-represented Luftwaffe view of the campaign and looks at the new technology and tactics at its heart. From the innovative development of specialist night-fighters to the 'Battle of the Beams' that pitted German electronic navigation systems against British countermeasures, the Blitz demonstrated the effects of developing technology on aerial warfare.Describing and analyzing the strategy, tactics and operations of both the Luftwaffe and the UK's air defences during the period between September 1940 and May 1941, author Julian Hale demonstrates that, for a variety of reasons, there was little chance of the Luftwaffe achieving any of its aims. Using primary sources, spectacular original artwork, 3D diagrams and maps, this study shines a fresh light on how and why the world's first true strategic air offensive failed.

Japanese Infantryman vs US Marine Rifleman: Tarawa, Roi-Namur, and Eniwetok, 1943–44 (Combat #75)
by Gregg AdamsFeaturing evocative artwork plates and carefully selected photographs, this book assesses the US Marines and Japanese troops who contested the islands of Tarawa, Roi-Namur, and Eniwetok during 1943–44. On November 20, 1943, amphibious vehicles carrying Marines of the 2d Marine Division reached the shores of Betio Island in the Tarawa Atoll, defended by a determined Japanese garrison that would fight to the last man. This began a test by combat of over two decades of US studies, analyses, and planning for capturing and defending naval bases in Micronesia. The Tarawa assault was followed in February 1944 by the rapid capture of the Kwajalein and Eniwetok atolls in the Marshall Islands. In these battles US Marines fought a mix of Imperial Japanese Navy and Imperial Japanese Army ground units. All but a handful of the defenders, whether they were organized ground combat troops or infantry improvised from aviators and service troops, were determined to die for the Emperor while killing as many of the enemy as possible. In this study, Gregg Adams shows how the US Marine Corps and US Navy drew upon these pivotal actions to improve their tactics, organization, and equipment for the next round of amphibious operations. He also explains how their Japanese opponents – realizing that isolated island garrisons were doomed to destruction or isolation if the Imperial Japanese Navy could not defeat the US Navy at sea – moved from seeking to repel an invasion to one inflicting maximum American casualties through prolonged defensive fighting.
British Light Infantryman vs Patriot Rifleman: American Revolution 1775–83 (Combat)
by Robbie MacNivenFully illustrated, this book assesses the origins, equipment, and fighting styles of the irregular warfare specialists fighting on both sides during the American Revolutionary War.Amid North America's often forested, broken, or rugged terrain, 18th-century armies came to rely on soldiers capable of fighting individually or in small groups. During the American Revolutionary War, rifle-armed companies were incorporated into the newly created Continental Army, while Patriot militiamen and partisans also made use of rifled weapons. Facing them were the British Army's light infantrymen; among the most experienced regular soldiers fighting for the Crown, they were joined by Loyalist units able to operate in dispersed formations and German hired troops skilled in open-order fighting, including the rifle-armed Jäger.The strengths and limitations of both sides' open-order specialists are evaluated in this book, with particular focus upon three revealing battles: Harlem Heights (September 16, 1776), where the Patriots took heart from being able to hold their own in an escalating clash with Crown light forces; Freeman's Farm (September 19, 1777), where British light infantry engaged Patriot riflemen in notably rough terrain; and Hanging Rock (August 6, 1780), where Patriot riflemen and partisans attacked a Loyalist encampment, including Provincial Corps light infantry. Specially commissioned artwork, archive illustrations, and newly drawn mapping complement the authoritative text.
Waffen-SS Soldier vs Soviet Rifleman: Rostov-on-Don and Kharkov 1942–43 (Combat)
by Chris McNabFully illustrated, this study assesses the Soviet and Waffen-SS troops who contested the cities of Kharkov and Rostov-on-Don on the Eastern Front during 1942–43. As the Axis invasion of the Soviet Union unfolded, two places that suffered exceptionally severely were Kharkov (now Kharkiv) in Ukraine and Rostov-on-Don in Russia. In total, Kharkov would change hands violently four times between October 1941 and August 1943, and Rostov-on-Don also four times between November 1941 and February 1943. In this book, Chris McNab examines the fighting men of the Red Army and the Waffen-SS who clashed in three battles – one for Rostov (July 1942) and two for Kharkov (February–March and August). He clearly explains the key differences between these two opponents – training, tactics, weaponry, ideology and motivation – and examines how these differences played out in the three engagements, which ranged from open-terrain combined-arms battles to close-quarters street fighting in major urban zones. The text is complemented by specially commissioned artwork and mapping and carefully chosen archive photographs.
Allied Tanks at El Alamein 1942 (New Vanguard #321)
by William E. HiestandExamines Eighth Army's 1,000-strong tank force – rebuilt, reorganized, and equipped with brand-new Sherman and Churchill tanks – that secured victory at the Second Battle of El Alamein.When Eighth Army retired into the defensive line at El Alamein on 30 June 1942, it was tired, dispirited and had lost almost all its tanks during a string of defeats at Gazala, Tobruk and Mersa Matruh. After savage defensive fighting at First Alamein, the reinforced Desert Rats defeated Rommel's last offensive in a tank-to-tank clash at Alam Halfa in September. The next month, a completely rebuilt and reorganized Eighth Army, equipped with over 1,000 tanks including the American M4 Sherman, launched the offensive that would finally drive Rommel out of Africa.Montgomery shaped the Eighth Army according to his own military ideas, and on 23 October was able to attack the Axis defenses with the largest force of armoured divisions in its history, with the 1st, 8th and 10th united in a new 'corps de chasse' intended to defeat the Afrika Korps at its own game, and the 7th and two infantry support tank brigades assigned to support the XXX and XIII Corps. With the exception of the A9, 10 and 13 cruisers of 1940-41, as the offensive began, the Eighth Army contained every type of tank employed during the North Africa campaign.Using detailed illustrations of the tanks involved with an analysis of the tactics employed for battle, this is a focused examination of the tank forces that won the Second Battle of El Alamein - the most famous British Army victory of World War II, and one of the turning points of the war.