- Table View
- List View
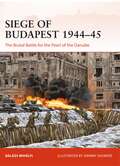
Siege of Budapest 1944–45: The Brutal Battle for the Pearl of the Danube (Campaign)
by Balázs MihályiA gripping and detailed study of the brutal urban battle for Budapest, which saw German and Hungarian troops struggling to halt the joint Soviet-Romanian offensive to take the key city on the Danube.The 52-day-long siege of Budapest witnessed some of the most destructive urban fighting of the war. The Transdanubia region was strategically vital to Nazi Germany for its raw materials and industry, and because of the bridgehead it allowed into Austria. As a result, Hitler declared Budapest a fortress city in early December 1944. The battle for the city pitted 90,000 German and Hungarian troops against 170,000 Soviet (2nd and 3rd Ukrainian Fronts) and Romanian attackers. The operations to take the city ran across several phases, from the initial Soviet approach to Budapest commencing in late October 1944, through the encirclement of city first on the Pest side of the Danube, and then on the Buda bank, and on to the savage urban fighting that began in December 1944 for the Hungarian capital. This superbly detailed work analyses the background, chronology and consequences of the siege from both a military and political perspective, and documents the huge losses in military and civilian casualties and material damage.
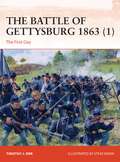
The Battle of Gettysburg 1863: The First Day (Campaign)
by Timothy J. OrrThis first volume of three discusses the tactical decisions made on day one and the ensuing combat, while also including a brief summary of the grand strategy in the Eastern Theater of the war, the conduct of the Pennsylvania Campaign from June 6 to 30, 1863, and the plight of civilians caught up in the conflict.The Battle of Gettysburg, which took place July 1–3, 1863 in and around the town of Gettysburg, PA resulted in the largest number of casualties of the entire American Civil War and is seen as the key turning point in the conflict. On its first day, Confederate General Robert E. Lee's Army of Northern Virginia sought to destroy the Union army, forcing its men to retreat through the streets of the Pennsylvania town to the hills just to the south. This volume, the first of three to cover the battle in depth, includes the morning cavalry skirmish, the morning clash at the Herbst's Woodlot and at the railroad cut, the afternoon clash at Oak Ridge, the afternoon fight at the Edward McPherson farm, the afternoon rout of the 11th Corps, the last stand of the 1st Corps at Seminary Ridge, the Union retreat through town, and the positions of the armies at nightfall.
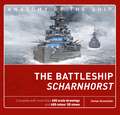
The Battleship Scharnhorst (Anatomy of The Ship)
by Stefan DraminskiThe Kriegsmarine's Scharnhorst was a German capital ship, described either as a battleship or battlecruiser, and the lead ship of her class, which included one other ship, Gneisenau. She was launched on 3 October 1936 and completed in January 1939, armed with nine 28cm C/34 guns in three triple turrets. She operated with Gneisenau for much of the early portion of World War II, including sorties into the Atlantic to raid British merchant shipping. They took part in Operation Weserübung (April–June 1940), the German invasion of Norway, during which they sank the aircraft carrier HMS Glorious and her escort destroyers Acasta and Ardent. Scharnhorst also sank HMS Rawalpindi in November 1939. In early 1943, Scharnhorst joined the Tirpitz in Norway to intercept Allied convoys to the Soviet Union. On a sortie from Norway to attack a convoy, the German force was intercepted by British ships and during the Battle of the North Cape (26 December 1943), HMS Duke of York and her escorts sank Scharnhorst. Most of her crew was lost. This is the most comprehensive examination of Scharnhorst ever published, drawing on new research and technology to tell the full story of the ship. It includes a complete set of detailed line drawings with fully descriptive keys and full-colour 3D artwork, supported by technical details, photographs, and text on the building of the ship, as well as a record of her service history.
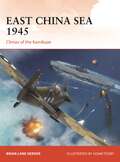
East China Sea 1945: Climax of the Kamikaze (Campaign)
by Brian Lane HerderThis study describes the air-sea offensive supporting the ground-force invasions of Iwo Jima and Okinawa in February and April 1945, which led to the sinking of the Yamato and the onslaught of the Japanese kamikaze.During the Pacific War, the island invasions of Iwo Jima and Okinawa were the last two major ground campaigns. By the time these took place in early 1945, the US Navy had reached an exceptional level of coordination in its amphibious operations, and was able to overrun and subdue Japanese territories efficiently. Faced with the increasing might of these forces and to prevent further defeat, Imperial Japan deployed its kamikaze aircraft and attacked many US heavy aircraft carriers and destroyers; several were sunk, while others were knocked out of the war. This superbly illustrated book explores the air–sea aspects of the pivotal battles that took place, and includes the “death ride” of the Japanese battleship Yamato (the largest ever built), and the mass kamikaze attacks off Iwo Jima and Okinawa, as well as the Iwo Jima and Okinawa amphibious invasions and the naval and air bombardments of the two islands. It also considers the contribution of the USAAF and the British Pacific Fleet to the eventual victory of US air and ground forces.

World War II Fighter Planes Spotter's Guide
by Tony HolmesWorld War II saw pilots from around the world battling in the skies over Europe, Asia and Africa, with victory resting upon their nerve, skill and the capabilities of some of history's most iconic aircraft. In the chaos of battle, it was vital that they could quickly identify friend from foe. But do you know your Hurricane from your Bf 109, or what the legendary P-51 Mustang looks like? Do you know the wingspan of the A6M Zero-sen, or how fast it could fly?THE WORLD WAR II FIGHTER PLANES SPOTTER'S GUIDE answers all of these questions and more, providing essential information on over 90 legendary aircraft, from the celebrated Spitfire to the jet-powered Me 262. Featuring full-colour artwork to aid recognition, as well as all the details you need to assess their performance, this is the perfect pocket guide to the Allied and Axis fighters of World War II

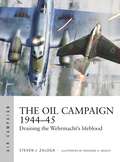
The Oil Campaign 1944–45: Draining the Wehrmacht's lifeblood (Air Campaign)
by Steven J. ZalogaA new illustrated history of one of the key air campaigns of late World War II – the American effort to cripple Germany's oil production, and grind its armed forces to a halt.With retreating German forces losing their oilfields on the Eastern Front, Germany was reliant on its own facilities, particularly for producing synthetic oil from coal. However, these were within range of the increasingly mighty Allied air forces. In 1944 the head of the US Strategic Air Forces, General Carl Spaatz was intent on a new campaign that aimed to cripple the German war machine by depriving it of fuel. The USAAF's Oil Campaign built up momentum during the summer of 1944 and targeted these refineries and plants with its daylight heavy bombers. Decrypted German communications made it clear that the Oil Campaign was having an effect against the Wehrmacht. Fuel shortages in the autumn of 1944 forced the Luftwaffe to ground most of its combat units except for fighters involved in the defense of the Reich. Fuel shortages also forced the Kriegsmarine to place most of its warships in harbor except for the U-boats and greatly hampered German army campaigns such as the Battle of the Bulge in December 1944–45. This fascinating book packed with key photos and illustrations examines the controversies and debates over the focus of the US bombing campaign in the final year of the war, and the impact it had on the war effort overall.

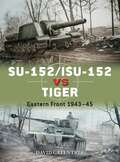
SU-152/ISU-152 vs Tiger: Eastern Front 1943–45 (Duel)
by David GreentreeThis fully illustrated volume compares two of the most iconic AFV's: the SU-152/ISU-152 and the Tiger, used on the Eastern Front during World War II.On the Eastern Front in 1943, the Tiger-equipped heavy Panzer battalions gave German armoured divisions an unmatched capability that cost the Red Army dearly. The Tiger's 88mm gun had the potential to carve through Soviet defences in the attack and cause havoc amongst advancing Soviet armoured formations when used in defence. Neither of the Red Army's heavy tanks (the KV-1 and KV-2) could match the Tiger's gun, and, more importantly, penetrate its armour at anything approaching standard combat range. The Soviet response was a stopgap Tiger-killing vehicle that mounted a 152mm artillery piece onto the KV tank's chassis: the SU-152. The latter would evolve into the ISU-152 in late 1943 (mounting the same powerful gun on an IS chassis). This fascinating book describes the mighty duels fought between these opposing AFVs. The colour illustrations explore key details of both the SU-152/ISU-152 and Eastern Front Tigers, including armament, ammunition and crew positions, and the period photographs show rarely seen views of these iconic AFVs in action. How each attempted to best the other using its strengths and advantages is documented across a wide range of dramatic Eastern Front armoured battles.
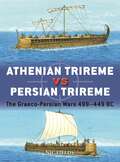
Athenian Trireme vs Persian Trireme: The Graeco-Persian Wars 499–449 BC (Duel)
by Nic FieldsA fascinating and detailed exploration of one of the most famous warships of the Ancient world - the trireme - and its tactical employment by the opposing sides in the 5th-century BC Graeco-Persian Wars.You may be familiar with the Athenian trireme – but how much do you know about the ram-armed, triple-oared warships that it dueled against at the battles of Artemision, Salamis and the Eurymedon River? How similar or different were these warships to each other? And why did the Persians rely on Phoenician vessels to form much of their navy? Much attention has been devoted to the Greek trireme, made famous by modern reconstruction – with only passing notice given to the opposing Persian navy's vessels in illustrated treatments. Join us on the Aegean as, for the first time, we reveal a rarely attempted colour reconstruction of a trireme in Persian service. Compare the form, construction, design, manoeuvrability, and tactical deployment of the opposing triremes, aided by stunning illustrations. Man the decks of these warships with the fighting complement of Greek citizen hoplites, Scythian archers and Persian marines, and learn why the Greeks placed a bounty of 10,000 drachmae on the head of Artemisia – the Karian queen and Persian admiral, and the only woman among Xerxes' commanders.
SU-152/ISU-152 vs Tiger: Eastern Front 1943–45 (Duel)
by David GreentreeThis fully illustrated volume compares two of the most iconic AFV's: the SU-152/ISU-152 and the Tiger, used on the Eastern Front during World War II.On the Eastern Front in 1943, the Tiger-equipped heavy Panzer battalions gave German armoured divisions an unmatched capability that cost the Red Army dearly. The Tiger's 88mm gun had the potential to carve through Soviet defences in the attack and cause havoc amongst advancing Soviet armoured formations when used in defence. Neither of the Red Army's heavy tanks (the KV-1 and KV-2) could match the Tiger's gun, and, more importantly, penetrate its armour at anything approaching standard combat range. The Soviet response was a stopgap Tiger-killing vehicle that mounted a 152mm artillery piece onto the KV tank's chassis: the SU-152. The latter would evolve into the ISU-152 in late 1943 (mounting the same powerful gun on an IS chassis). This fascinating book describes the mighty duels fought between these opposing AFVs. The colour illustrations explore key details of both the SU-152/ISU-152 and Eastern Front Tigers, including armament, ammunition and crew positions, and the period photographs show rarely seen views of these iconic AFVs in action. How each attempted to best the other using its strengths and advantages is documented across a wide range of dramatic Eastern Front armoured battles.
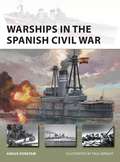
Warships in the Spanish Civil War (New Vanguard)
by Angus KonstamThis detailed study of the naval Spanish Civil War describes how the Spanish Navy, torn in two and comprising a Republican and Nationalist part, fought a civil war at sea involving both Hitler's and Mussolini's navies.In July 1936, a pro-fascist coup orchestrated by General Franco tore Spain apart and plunged the country into a bitter civil war. Like Spain itself, the Spanish Navy was torn in two: crews and most ships remained loyal to the Republican government but many of the Navy's officers joined Franco's rebels, and warships under repair or 'mothballed' in southern ports soon fell to the rebel advance. These formed the basis of Franco's 'Nationalist fleet,' and with both Italian and German help, the rebels were able to contest the Republic's control of Spanish waters. Overall the Republican Navy held its own, despite mounting losses, until the collapse of the Republican Army led to the fleet seeking internment in French North Africa. Packed with contemporary photographs and full colour illustrations, this study examines the composition and organization of the two rival fleets, the capabilities of their ships and submarines, and the performance of their crews. It also covers the warships of the Basque Auxiliary Navy - an offshoot of the Republican Fleet - and other navies who played a part in the conflict, most notably the Italian Regia Marina.
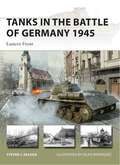
Tanks in the Battle of Germany 1945: Eastern Front (New Vanguard)
by Steven J. ZalogaA new history and analysis of the German and Soviet tank forces that battled on eastern German soil in the final months of World War II.The final months of World War II on the Eastern Front saw the Wehrmacht fighting with exhausted armoured divisions, albeit now armed with the most advanced and heaviest tanks of the war, to slow the Soviet advance. The Red Army meanwhile was rolling relentlessly westwards, with its own highly developed tank forces now equipped with T34/85s and the huge IS-2 heavy tanks, intent on taking Berlin and as much German territory as possible.This book is a history and analysis of the state of these two mighty armoured forces, as their battles decided the fate of Germany. It covers their initial encounters on the German frontier in 1944 (East Prussia), the fighting of the Oder-Vistula offensive in January 1945 and describes the condition of the German tank forces and their Hungarian allies as they were beaten back. It also considers the huge impact of The Red Army and other significant Allied forces such as those from Poland, Czechoslovakia and Romania on the outcome of victory in the war.
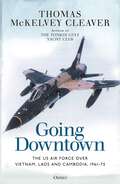
Going Downtown: The US Air Force over Vietnam, Laos and Cambodia, 1961–75
by Thomas McKelvey CleaverThis vivid narrative history tells the full story of the US Air Force's involvement in the wars in the air over Vietnam, Laos and Cambodia.The involvement of the US Air Force in the Southeast Asian Wars began in 1962 with crews sent to train Vietnamese pilots, and with conflict in Laos, and finally ended in 1972 with the B-52 bombing of Hanoi, though there were Air Force pilots unofficially flying combat in Laos up to the end in 1975. The missions flown by USAF aircrews during those years in Southeast Asia differed widely, from attacking the Ho Chi Minh Trail at night with modified T-28 trainers, to missions “Downtown,” the name aircrew gave Hanoi, the central target of the war. This aerial war was dominated by the major air operations against the north: Rolling Thunder from 1965 to 1968, and then Linebacker I and II in 1972, with the latter seeing the deployment of America's fearsome B-52 bombers against the North Vietnamese capital Hanoi. These operations were carried out in the face of a formidable Soviet-inspired air defence system bristling with anti-aircraft guns and SAM missile sites. Beyond this, the US Air Force was intimately involved in secret air wars against Laos and Cambodia – one cannot speak of a war only in Vietnam regarding US Air Force operations. The war the Air Force fought was a war in Southeast Asia. Following on from the same author's The Tonkin Gulf Yacht Club, which told the story of the US Navy's involvement in the Vietnam War, Downtown completes the picture. Featuring a wide range of personal accounts and previously untold stories, this fascinating history brings together the full story of the US Air Force's struggle in the skies over Southeast Asia.
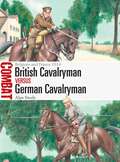
British Cavalryman vs German Cavalryman: Belgium and France 1914 (Combat)
by Alan SteeleFully illustrated, this book casts light on the utility and role of the German and British cavalry in the early stages of World War I on the Western Front.In the early months of World War I, before the fighting degenerated into static trench warfare, there was a brief period of mobile combat as the German Army advanced through Belgium and northern France, forcing the French and British forces facing them to retreat. Both sides in the escalating conflict deployed substantial numbers of cavalry units to screen their infantry forces, conduct reconnaissance and harness their superior mobility to undertake aggressive combat operations. In the summer of 1914, the British cavalry had the difficult task of covering the withdrawal of the British Expeditionary Force and the German cavalry, the equally demanding task, after weeks of combat and forced marches, of maintaining contact with a rapidly retiring enemy.In this book a comparative assessment is made of each side's doctrine, organization, equipment and training, followed by a detailed analysis of their actual performance in three key encounter actions: Casteau/Soignies (22 August), Cérizy/Moÿ (28 August) and Le Montcel/Frétoy (7 September). This analysis is supported by carefully chosen photographs and specially commissioned full-colour artwork and maps.
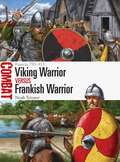
Viking Warrior vs Frankish Warrior: Francia 799–911 (Combat)
by Noah TetznerFully illustrated, this absorbing study assesses the warriors fighting on both sides during the Vikings' attacks on the Frankish realm in the 9th century, as raiding escalated into full-scale siege warfare.On the eve of the 9th century, Vikings first raided the Frankish Empire on the coast of what is now western France. Although this attack ended in disaster for the Scandinavians, Charlemagne reportedly wept, not in fear of his own life, but for the ensuing bloodshed brought upon his successors. Mobile parties of highly skilled Viking warriors would continue to raid Francia for decades; as these attacking contingents grew more numerous they began to assail powerful centres, besieging Paris in 845 and again in 885. To combat the Viking threat, Frankish kings mustered scores of infantrymen, then subsequently transitioned to cavalry-based forces in the 9th century. The dynamic nature of Viking activity in Francia meant that numbers and mobility would determine the fate of Charlemagne's Holy Roman Empire.This study documents the evolving trial of strength between the Vikings and the Franks under Charlemagne and his successors. Through a careful synthesis of primary sources, expert analysis and the archaeological record, the author invites the reader to visualize the fighting men who fought one another in Francia, and offers a balanced assessment of their successes and failures over decades of warfare during the Viking Age.
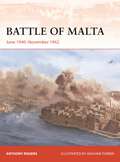
Battle of Malta: June 1940–November 1942 (Campaign #381)
by Anthony RogersA detailed exploration of the land, sea and air units that defended Malta, and the repeated Axis attempts to bring the crucial Allied island fortress to its knees.On 11 June 1940, the British crown colony of Malta – which dominated the central Mediterranean and all-important sea routes to and from North Africa – was bombed for the first time by aircraft of the Italian Regia Aeronautica. The Italians were joined in their efforts by the German Luftwaffe in January 1941. Malta was effectively beleaguered for nearly two and a half years, dependent for survival on naval supply convoys and reliant for defence on often-outnumbered fighter aircraft and anti-aircraft guns. Anthony Rogers provides a retelling of these events, drawing on accounts from both sides. This work features carefully selected photographic images, some previously unpublished. Seven specially commissioned colour maps explore the stategic situation in the Mediterranean in this period, the military sectors into which Malta's defence was divided, and German minelaying operations around the island. The three stunning battlescene artworks and 3D BEVs show key events from the battle, including the 26 July 1941 German attack on the Grand Harbour, and the major Luftwaffe raid 21 March 1942.

Battle of Malta: June 1940–November 1942 (Campaign)
by Anthony RogersA detailed exploration of the land, sea and air units that defended Malta, and the repeated Axis attempts to bring the crucial Allied island fortress to its knees.On 11 June 1940, the British crown colony of Malta – which dominated the central Mediterranean and all-important sea routes to and from North Africa – was bombed for the first time by aircraft of the Italian Regia Aeronautica. The Italians were joined in their efforts by the German Luftwaffe in January 1941. Malta was effectively beleaguered for nearly two and a half years, dependent for survival on naval supply convoys and reliant for defence on often-outnumbered fighter aircraft and anti-aircraft guns. Anthony Rogers provides a retelling of these events, drawing on accounts from both sides. This work features carefully selected photographic images, some previously unpublished. Seven specially commissioned colour maps explore the stategic situation in the Mediterranean in this period, the military sectors into which Malta's defence was divided, and German minelaying operations around the island. The three stunning battlescene artworks and 3D BEVs show key events from the battle, including the 26 July 1941 German attack on the Grand Harbour, and the major Luftwaffe raid 21 March 1942.
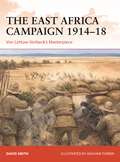
The East Africa Campaign 1914–18: Von Lettow-Vorbeck’s Masterpiece (Campaign)
by David SmithA fascinating, beautifully illustrated study of the daring war in East Africa waged by German colonial forces under Paul von Lettow-Vorbeck against the wide array of colonial and expeditionary forces of the Allied Powers.The East African Campaign in World War I comprised a series of battles and guerrilla actions which began in German East Africa in 1914 and spread to portions of Portuguese Mozambique, northern Rhodesia, British East Africa, the Uganda Protectorate, and the Belgian Congo. German colonial forces under Lieutenant-Colonel Paul von Lettow-Vorbeck attempt to divert Allied forces from the Western Front. Despite the efforts of the Allied forces, Lettow-Vorbeck's troops remained undefeated at the end of the war.In this fascinating work, David Smith documents how a wide array of British, Indian, South African, Belgian, Portuguese and local native forces invaded German East Africa and slowly ousted the German forces, a process made tortuous by Lettow-Vorbeck's masterful management of the campaign. Among the events covered in this work are the Battle of Tanga, the scuttling of the Königsberg, the German railway campaign, and the battles at Salaita Hill, Kondoa-Irangi, Mahenge, Mahiwa and Namacurra. Colourful period and specially commissioned illustrations bring to life a wide-ranging and eventful campaign in which a high price was extracted for every inch of ground given up.