Special Collections
World War 2
Description: books and accessible images to support themed learning about World War 2.
- Table View
- List View

World War II evacuee children (large print)
by RnibThis page shows an image of three small children. There is a locator dot shown, which will be at the top left of the page when the image is the correct way up. The children are shown standing facing forwards so both their arms, legs, eyes and ears can be found. There is a girl on the left, a boy in the middle and a smaller girl on the right. They each wear a luggage label which says their name and where they are being evacuated to. The girl on the left wears a short orange coat and a pink bonnet. She has a white box containing her gas mask hanging on a string around her neck. She has short pale grey socks and red sandals. The boy in the middle wears a brown cap and a very short grey coat. He has long grey socks which are wrinkled as they are falling down. He wears brown shoes and his gas mask box is on the ground to the left of them and rhere is a suitcase ti the right of them. The girl on the right wears a light purple coat to below her knees. On her head she has a small brown hat. She also has a white box containing her gas mask hanging on a string around her neck. She wears short pale grey socks and brown shoes.
World War II bren gun (UEB contracted)
by RnibThis is an image of a side view of a machine gun facing to the left. There is a locator dot shown, which will be at the top left of the page when the image is the correct way up. The muzzle is in the left of the page with the foresight sticking up from the barrel. The gun barrel goes right to the centre of the page. Just left of centre is a handle, it sticks up and right, the actual handle is nearly horizontal. To the right of this is a wide curved shape, also sticking up. This is the magazine full of bullets. The last thing sticking up on the right before the wooden butt is the back sight. Down and left from the butt on the right of the page is another wooden handle. To the left of it is an oval trigger guard and the trigger. On the left is a rod which goes down to the bottom left of the page. This is a rest stand to stabilise the gun when it is being fired. It can fold up to the right when the gun is being carried.
World War II field gun (UEB contracted)
by RnibThis is an image of a side view of a large gun facing to the left and some of the shells it could fire. There is a locator dot shown, which will be at the top left of the page when the image is the correct way up. The muzzle is in the top left of the page and the gun barrel slopes down to the right. Halfway down it goes through a protective shield shown edge on. The breech is shown as a rectangle at the end of the barrel, where a shell would be loaded. Down from the breech is a circular handle which is used to change the angle of the barrel so the correct range is found. Down and to the left of the handle is one of the large wheels needed to move the gun from one battle to another. It has very knobbly tyres. It is attached to the gun carriage which is up and right from the wheel. The end of the carriage on the right is where the gun is hooked onto the vehicle to tow it. There are five shells standing vertically to the left of the gun and one, lying on its side, pointing to the right under the carriage to the right.
World War II German doodlebug (UEB uncontracted)
by RnibThis page shows two images of the flying bomb, the V1 nicknamed doodlebug. At the top of the page seen from the side and in the bottom and middle of the page a plan view seen from above. There is a locator dot shown, which will be at the top left of the page when the image is the correct way up. Both views have the front on the left and the tail on the right of the page. In the top side view the body of the flying bomb is fatter on the left than the right. It is very streamlined. Halfway along the body the end of the wing can be found. It is angled up slightly to give the bomb lift when it flies. The pulse jet engine on the right is mounted onto the top of the bomb by two brackets. The end of the engine on the left is for air intake and the end on the right is the exhaust thrust. In the plan view image in the bottom and middle of the page the body of the bomb goes from left to right in the centre of the image. The wings go up and down the page from the body. On each wing there is a German cross indicating the bomb belongs to the Luftwaffe. The upper surface is green although sometimes camouflage colours were used so it was difficult to spot from the air. The underneath colour is a pale sky colour so it would be difficult to spot from the ground when flying.
World War II German doodlebug (UEB contracted)
by RnibThis page shows two images of the flying bomb, the V1 nicknamed doodlebug. At the top of the page seen from the side and in the bottom and middle of the page a plan view seen from above. There is a locator dot shown, which will be at the top left of the page when the image is the correct way up. Both views have the front on the left and the tail on the right of the page. In the top side view the body of the flying bomb is fatter on the left than the right. It is very streamlined. Halfway along the body the end of the wing can be found. It is angled up slightly to give the bomb lift when it flies. The pulse jet engine on the right is mounted onto the top of the bomb by two brackets. The end of the engine on the left is for air intake and the end on the right is the exhaust thrust. In the plan view image in the bottom and middle of the page the body of the bomb goes from left to right in the centre of the image. The wings go up and down the page from the body. On each wing there is a German cross indicating the bomb belongs to the Luftwaffe. The upper surface is green although sometimes camouflage colours were used so it was difficult to spot from the air. The underneath colour is a pale sky colour so it would be difficult to spot from the ground when flying.
World War II German doodlebug (large print)
by RnibThis page shows two images of the flying bomb, the V1 nicknamed doodlebug. At the top of the page seen from the side and in the bottom and middle of the page a plan view seen from above. There is a locator dot shown, which will be at the top left of the page when the image is the correct way up. Both views have the front on the left and the tail on the right of the page. In the top side view the body of the flying bomb is fatter on the left than the right. It is very streamlined. Halfway along the body the end of the wing can be found. It is angled up slightly to give the bomb lift when it flies. The pulse jet engine on the right is mounted onto the top of the bomb by two brackets. The end of the engine on the left is for air intake and the end on the right is the exhaust thrust. In the plan view image in the bottom and middle of the page the body of the bomb goes from left to right in the centre of the image. The wings go up and down the page from the body. On each wing there is a German cross indicating the bomb belongs to the Luftwaffe. The upper surface is green although sometimes camouflage colours were used so it was difficult to spot from the air. The underneath colour is a pale sky colour so it would be difficult to spot from the ground when flying.
World War II field gun (UEB uncontracted)
by RnibThis is an image of a side view of a large gun facing to the left and some of the shells it could fire. There is a locator dot shown, which will be at the top left of the page when the image is the correct way up. The muzzle is in the top left of the page and the gun barrel slopes down to the right. Halfway down it goes through a protective shield shown edge on. The breech is shown as a rectangle at the end of the barrel, where a shell would be loaded. Down from the breech is a circular handle which is used to change the angle of the barrel so the correct range is found. Down and to the left of the handle is one of the large wheels needed to move the gun from one battle to another. It has very knobbly tyres. It is attached to the gun carriage which is up and right from the wheel. The end of the carriage on the right is where the gun is hooked onto the vehicle to tow it. There are five shells standing vertically to the left of the gun and one, lying on its side, pointing to the right under the carriage to the right.
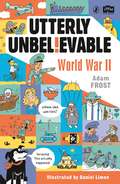
Utterly Unbelievable
by Adam FrostPrepare to discover the most utterly unbelievable REAL facts about WWII . . . Did you know that onions were given as birthday presents in WWII? Or that exploding camel dung was used as a weapon? Could a leaky toilet force a submarine crew to abandon ship?This is history like you've never known it before! Ask yourself . . .Would you eat squirrel tail soup, cow's udders, or a carrot on a stick? Could you share 12.7cm of bathwater with your WHOLE family - for your weekly wash? If you were a spy, which gadgets and inventions would you choose?From flying tanks to Operation Toenail, read about the daring, tragic and heroic events that shaped one of the most influential conflicts in modern times. With a bold design and colourful illustrations, picture the most amazing, and unbelievable, facts from this world-changing time.Puffin and IWM (Imperial War Museums) are proud to be working together to educate and inspire young readers with tales from the past. Puffin know that stories can take you anywhere. As one of the most beloved children's publishers, we aim to fire every young imagination. Uncovering people's experiences during wartime, from the First World War to the present day, IWM is a family of five museums (IWM London, Churchill War Rooms, HMS Belfast, IWM North, and IWM Duxford).
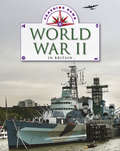
World War II in Britain
by Liz Gogerly'The past is all around us, if we know where to look.' This series takes a look at archaeological, structural and museum evidence from around Britain, allowing readers to build up a picture of what life was like in key historical periods and how you can discover it for yourself by visiting sites around the country.
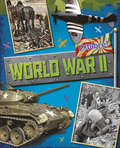
World War Two
by Jane BinghamThis photographic book gives you an overview of World War Two. From how the war began to how it spread worldwide, the new technology that was used in war for the first time, how women's roles changed in society because of the war, what life was like on the home front, and how the war was recorded in pictures, diaries, poems and stories. You can learn about key figures, such as Winston Churchill, and events, such as The Holocaust. You can also read a diary entry from the Blitz and learn how to create your own secret code.

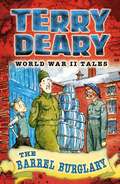
World War II Tales
by Terry Deary and James De RueStories of the Second World War on the Home Front from the bestselling Terry Deary, author of the hugely successful Horrible Histories. With food scarce and rationing taking hold, plenty of people turned to the black market to get more than their share. In this tale, a girl finds herself mixed up in a spiv's illegal dealings - and what is the secret of the haunted farm?
World War II Tales
by Terry Deary and James De RueStories of the Second World War on the Home Front from the bestselling Terry Deary, author of the hugely successful Horrible Histories. A story of the old soldiers who made up the Home Guard, and the young people who helped them. The Home Guard of a small town need supplies but the local factory owner won't help. So they decide to use unconventional methods...

World War II Tales
by Terry Deary and James De RueStories of the Second World War on the Home Front from the bestselling Terry Deary, author of the hugely successful Horrible Histories. In this retelling of an extraordinary true story, a pair of children realise that the odd strangers they see in their tiny Scottish village are German spies. Can the children alert the authorities or will the ruthless spies find them first?
World War II Tales
by Terry Deary and James De RueStories of the Second World War on the Home Front from the bestselling Terry Deary, author of the hugely successful Horrible Histories. With food scarce and rationing taking hold, plenty of people turned to the black market to get more than their share. In this tale, a girl finds herself mixed up in a spiv's illegal dealings - and what is the secret of the haunted farm?

World War II Tales
by Terry Deary and James De RueStories of the Second World War on the Home Front from the bestselling Terry Deary, author of the hugely successful Horrible Histories. A story of the old soldiers who made up the Home Guard, and the young people who helped them. The Home Guard of a small town need supplies but the local factory owner won't help. So they decide to use unconventional methods...
World War II bombed street (UEB uncontracted)
by RnibThis page shows an image of bomb damaged houses surrounded by an image border. There is a locator dot shown, which will be at the top left of the page when the image is the correct way up. There are three terraced houses and an old fashioned lamp post. The house in the middle is nearly completely destroyed. Only part of a window with broken glass remains to the left of the open doorway. The lamp post is in front of this house and leans precariously to the left. The house on the left is only damaged upstairs. Some of the roof slates have been blown off exposing some of the roof timber. Some of the wall to the room above the front door is missing. The house on the right is damaged upstairs and downstairs. Lots of the roof slates have been blown off also exposing some of the roof timber. The left upstairs window is half missing with broken glass. Most of this room is missing. The downstairs room is half missing. Its window is intact although the glass is cracked. To the right the front door and the window above are not damaged.
World War II bombed street (UEB contracted)
by RnibThis page shows an image of bomb damaged houses surrounded by an image border. There is a locator dot shown, which will be at the top left of the page when the image is the correct way up. There are three terraced houses and an old fashioned lamp post. The house in the middle is nearly completely destroyed. Only part of a window with broken glass remains to the left of the open doorway. The lamp post is in front of this house and leans precariously to the left. The house on the left is only damaged upstairs. Some of the roof slates have been blown off exposing some of the roof timber. Some of the wall to the room above the front door is missing. The house on the right is damaged upstairs and downstairs. Lots of the roof slates have been blown off also exposing some of the roof timber. The left upstairs window is half missing with broken glass. Most of this room is missing. The downstairs room is half missing. Its window is intact although the glass is cracked. To the right the front door and the window above are not damaged.
Vulcan - Long-range Medium Bomber (large print)
by RnibThis is an image of a jet bomber seen from above. There is a locator dot shown, which will be at the top left of the page when the image is the correct way up. The image is in the centre and a scale in metres on the left of the page. The aircraft nose is in the top centre and the tail in the bottom centre of the page. The fuselage goes up and down the middle of the page. The cockpit is shown as a tiny window near the nose. The wings sweep down to the left and right and are widest at the tail end. Sticking out from the end of the aircraft there are two jet engine nozzles to the left and right of the tail. The bottom edge of the wing has four flaps on each side, these are the ailerons used to manoeuvre the aircraft when it is flying.
Vulcan - Long-range Medium Bomber (UEB contracted)
by RnibThis is an image of a jet bomber seen from above. There is a locator dot shown, which will be at the top left of the page when the image is the correct way up. The image is in the centre and a scale in metres on the left of the page. The aircraft nose is in the top centre and the tail in the bottom centre of the page. The fuselage goes up and down the middle of the page. The cockpit is shown as a tiny window near the nose. The wings sweep down to the left and right and are widest at the tail end. Sticking out from the end of the aircraft there are two jet engine nozzles to the left and right of the tail. The bottom edge of the wing has four flaps on each side, these are the ailerons used to manoeuvre the aircraft when it is flying.
World War II bombed street (large print)
by RnibThis page shows an image of bomb damaged houses surrounded by an image border. There is a locator dot shown, which will be at the top left of the page when the image is the correct way up. There are three terraced houses and an old fashioned lamp post. The house in the middle is nearly completely destroyed. Only part of a window with broken glass remains to the left of the open doorway. The lamp post is in front of this house and leans precariously to the left. The house on the left is only damaged upstairs. Some of the roof slates have been blown off exposing some of the roof timber. Some of the wall to the room above the front door is missing. The house on the right is damaged upstairs and downstairs. Lots of the roof slates have been blown off also exposing some of the roof timber. The left upstairs window is half missing with broken glass. Most of this room is missing. The downstairs room is half missing. Its window is intact although the glass is cracked. To the right the front door and the window above are not damaged.
Vulcan - Long-range Medium Bomber (UEB uncontracted)
by RnibThis is an image of a jet bomber seen from above. There is a locator dot shown, which will be at the top left of the page when the image is the correct way up. The image is in the centre and a scale in metres on the left of the page. The aircraft nose is in the top centre and the tail in the bottom centre of the page. The fuselage goes up and down the middle of the page. The cockpit is shown as a tiny window near the nose. The wings sweep down to the left and right and are widest at the tail end. Sticking out from the end of the aircraft there are two jet engine nozzles to the left and right of the tail. The bottom edge of the wing has four flaps on each side, these are the ailerons used to manoeuvre the aircraft when it is flying.
JU 87 Stuka Dive Bomber (UEB contracted)
by RnibThis page shows two images of an aircraft. At the top of the page seen from the side and in the bottom and middle of the page a plan view seen from above. There is a locator dot shown, which will be at the top left of the page when the image is the correct way up. Both views have the front on the left and the tail on the right of the page. The aircraft is shown in a flying position. The aircraft in the top of the page has the propeller on the left with one blade pointing up and one pointing down. The tip of the nose cone is yellow on the large print image. Up and right there is a notch in the fuselage, this is the air intake for the engine. Down from this is a rectangle which comprises six exhaust outlets. The bottom left of the front of the aircraft nose has a notch. This is the air intake for the radiator. To the right, down from the exhaust, are outlets for hot air to escape. In the top centre of the image is the cockpit cover. It has an aerial sticking up. Poking up and right is a gun the rear gunner would use if the aircraft was attacked. Down from the cockpit is the wingtip and mainly underside of the wing. The wings on this aircraft are angled down a short way as they leave the fuselage. They then kink upwards towards the tip of the wing, allowing the underside to be found. One of the two front wheels is shown down from the wing. The wheel is largely hidden by the streamlined wheel cover. A single large bomb is attached under the cockpit between the wheels. The leg of the wheel hides the central part of the bomb. Right of the wing the fuselage continues to the vertical tail fin on the right. In the centre of this section is a cross identifying the plane as German. In the centre of the fin is the end of one of the tail wings. Right of this is a vertical flap. This is one of the ailerons used to manoeuvre the aircraft when it is flying. Down from the fin is the single small tail wheel. In the plan view image in the bottom and middle of the page the fuselage goes from left to right in the centre of the image. The main wings go up and down the page from the fuselage. In the left of the page the propeller has one blade pointing up and one pointing down. The tip of the nose cone is yellow on the large print image. To the right of the propeller six exhaust outlets can be found on the top and bottom edge of the fuselage. Right of this are the wings. On the wings near the fuselage there is a horizontal line which is where the wing kinks. Towards the tips of each wing there is a cross identifying the plane as German. The trailing edge of the wings on the right has flaps which are the automatic airbrakes used to take the aircraft out of a dive so it does not crash. In the centre of the fuselage between the wings is the cockpit. The fuselage continues to the right ending in the tailplane. On the right of each tail wing is a flap. These are two of the ailerons used to manoeuvre the aircraft when it is flying.
Avro Lancaster Bomber (UEB uncontracted)
by RnibThis page shows two images of an aircraft. At the top of the page seen from the side and in the bottom and middle of the page a plan view seen from above. There is a locator dot shown, which will be at the top left of the page when the image is the correct way up. Both views have the front on the left and the tail on the right of the page. The aircraft is shown in a flying position so the front wheels are retracted and not shown. The aircraft in the top of the page has a transparent nose cone on the left which is where the bomb aimer sits. Up and right from this is the fore gunner's turret. Up and right from this again is the main cockpit cover. Down from the cockpit are two propellers. They are attached to engines which hang off the wing. To the right of the propellers is a small rectangle which comprises six exhaust outlets on the outer side of the outside engine. Right from the exhaust is the tip of the wing pointing towards you. The centre of the fuselage has letters identifying which individual aircraft it is. There is also a red and blue roundel indicating the plane belongs to the RAF. On the top edge of the fuselage there is a gun turret with the gun pointing up and to the right. Right of this the fuselage continues to one of the vertical tail fins. On the right of this is a vertical flap. This is one of the ailerons used to manoeuvre the aircraft when it is flying. The tail has a red rectangle and a blue rectangle separated by a white line indicating the plane belongs to the RAF. Down from the tail fin is the single rear wheel. To the right of the tail is the rear gun turret with the gun pointing right and down. In the plan view image in the bottom and middle of the page the fuselage goes from left to right in the centre of the image. The main wings go up and down the page from the fuselage. On the left the fuselage starts with a transparent nose cone which is where the bomb aimer sits. Right from this is the fore gunner's turret. Its guns cross above the bomb aimer. Right from this is the main cockpit cover. There are two small hatches in the centre of the fuselage and right from them is a gun turret with the guns pointing to the right. The fuselage finishes on the right with the rear gun turret with the guns pointing to the right. In the centre of the page the main wings each have two engines and propellers sticking out to the left. To the right of the propellers six exhaust outlets can be found on the top and bottom edge of each engine. Towards the end of each wing is a red and blue roundel indicating the plane belongs to the RAF. On the right of each wing tip is a flap. These are two of the ailerons used to manoeuvre the aircraft when it is flying. On the right of the page is the tailplane. The right half of each tail wing is a flap. These are two more of the ailerons used to manoeuvre the aircraft when it is flying. The ends of the tail wing, up and down the page have the ends of the two vertical fins showing. The plane is green although it was also commonly painted with camouflage colours. The underside is dark grey or black. This would mean the aircraft was difficult to detect from the ground when out on night bombing raids.
Avro Lancaster Bomber (UEB contracted)
by RnibThis page shows two images of an aircraft. At the top of the page seen from the side and in the bottom and middle of the page a plan view seen from above. There is a locator dot shown, which will be at the top left of the page when the image is the correct way up. Both views have the front on the left and the tail on the right of the page. The aircraft is shown in a flying position so the front wheels are retracted and not shown. The aircraft in the top of the page has a transparent nose cone on the left which is where the bomb aimer sits. Up and right from this is the fore gunner's turret. Up and right from this again is the main cockpit cover. Down from the cockpit are two propellers. They are attached to engines which hang off the wing. To the right of the propellers is a small rectangle which comprises six exhaust outlets on the outer side of the outside engine. Right from the exhaust is the tip of the wing pointing towards you. The centre of the fuselage has letters identifying which individual aircraft it is. There is also a red and blue roundel indicating the plane belongs to the RAF. On the top edge of the fuselage there is a gun turret with the gun pointing up and to the right. Right of this the fuselage continues to one of the vertical tail fins. On the right of this is a vertical flap. This is one of the ailerons used to manoeuvre the aircraft when it is flying. The tail has a red rectangle and a blue rectangle separated by a white line indicating the plane belongs to the RAF. Down from the tail fin is the single rear wheel. To the right of the tail is the rear gun turret with the gun pointing right and down. In the plan view image in the bottom and middle of the page the fuselage goes from left to right in the centre of the image. The main wings go up and down the page from the fuselage. On the left the fuselage starts with a transparent nose cone which is where the bomb aimer sits. Right from this is the fore gunner's turret. Its guns cross above the bomb aimer. Right from this is the main cockpit cover. There are two small hatches in the centre of the fuselage and right from them is a gun turret with the guns pointing to the right. The fuselage finishes on the right with the rear gun turret with the guns pointing to the right. In the centre of the page the main wings each have two engines and propellers sticking out to the left. To the right of the propellers six exhaust outlets can be found on the top and bottom edge of each engine. Towards the end of each wing is a red and blue roundel indicating the plane belongs to the RAF. On the right of each wing tip is a flap. These are two of the ailerons used to manoeuvre the aircraft when it is flying. On the right of the page is the tailplane. The right half of each tail wing is a flap. These are two more of the ailerons used to manoeuvre the aircraft when it is flying. The ends of the tail wing, up and down the page have the ends of the two vertical fins showing. The plane is green although it was also commonly painted with camouflage colours. The underside is dark grey or black. This would mean the aircraft was difficult to detect from the ground when out on night bombing raids.
Avro Lancaster Bomber (large print)
by RnibThis page shows two images of an aircraft. At the top of the page seen from the side and in the bottom and middle of the page a plan view seen from above. There is a locator dot shown, which will be at the top left of the page when the image is the correct way up. Both views have the front on the left and the tail on the right of the page. The aircraft is shown in a flying position so the front wheels are retracted and not shown. The aircraft in the top of the page has a transparent nose cone on the left which is where the bomb aimer sits. Up and right from this is the fore gunner's turret. Up and right from this again is the main cockpit cover. Down from the cockpit are two propellers. They are attached to engines which hang off the wing. To the right of the propellers is a small rectangle which comprises six exhaust outlets on the outer side of the outside engine. Right from the exhaust is the tip of the wing pointing towards you. The centre of the fuselage has letters identifying which individual aircraft it is. There is also a red and blue roundel indicating the plane belongs to the RAF. On the top edge of the fuselage there is a gun turret with the gun pointing up and to the right. Right of this the fuselage continues to one of the vertical tail fins. On the right of this is a vertical flap. This is one of the ailerons used to manoeuvre the aircraft when it is flying. The tail has a red rectangle and a blue rectangle separated by a white line indicating the plane belongs to the RAF. Down from the tail fin is the single rear wheel. To the right of the tail is the rear gun turret with the gun pointing right and down. In the plan view image in the bottom and middle of the page the fuselage goes from left to right in the centre of the image. The main wings go up and down the page from the fuselage. On the left the fuselage starts with a transparent nose cone which is where the bomb aimer sits. Right from this is the fore gunner's turret. Its guns cross above the bomb aimer. Right from this is the main cockpit cover. There are two small hatches in the centre of the fuselage and right from them is a gun turret with the guns pointing to the right. The fuselage finishes on the right with the rear gun turret with the guns pointing to the right. In the centre of the page the main wings each have two engines and propellers sticking out to the left. To the right of the propellers six exhaust outlets can be found on the top and bottom edge of each engine. Towards the end of each wing is a red and blue roundel indicating the plane belongs to the RAF. On the right of each wing tip is a flap. These are two of the ailerons used to manoeuvre the aircraft when it is flying. On the right of the page is the tailplane. The right half of each tail wing is a flap. These are two more of the ailerons used to manoeuvre the aircraft when it is flying. The ends of the tail wing, up and down the page have the ends of the two vertical fins showing. The plane is green although it was also commonly painted with camouflage colours. The underside is dark grey or black. This would mean the aircraft was difficult to detect from the ground when out on night bombing raids.