Special Collections
World War 2
Description: books and accessible images to support themed learning about World War 2.
- Table View
- List View
World War II bren gun (UEB contracted)
by RnibThis is an image of a side view of a machine gun facing to the left. There is a locator dot shown, which will be at the top left of the page when the image is the correct way up. The muzzle is in the left of the page with the foresight sticking up from the barrel. The gun barrel goes right to the centre of the page. Just left of centre is a handle, it sticks up and right, the actual handle is nearly horizontal. To the right of this is a wide curved shape, also sticking up. This is the magazine full of bullets. The last thing sticking up on the right before the wooden butt is the back sight. Down and left from the butt on the right of the page is another wooden handle. To the left of it is an oval trigger guard and the trigger. On the left is a rod which goes down to the bottom left of the page. This is a rest stand to stabilise the gun when it is being fired. It can fold up to the right when the gun is being carried.
World War II bren gun (large print)
by RnibThis is an image of a side view of a machine gun facing to the left. There is a locator dot shown, which will be at the top left of the page when the image is the correct way up. The muzzle is in the left of the page with the foresight sticking up from the barrel. The gun barrel goes right to the centre of the page. Just left of centre is a handle, it sticks up and right, the actual handle is nearly horizontal. To the right of this is a wide curved shape, also sticking up. This is the magazine full of bullets. The last thing sticking up on the right before the wooden butt is the back sight. Down and left from the butt on the right of the page is another wooden handle. To the left of it is an oval trigger guard and the trigger. On the left is a rod which goes down to the bottom left of the page. This is a rest stand to stabilise the gun when it is being fired. It can fold up to the right when the gun is being carried.
World War II bombed street (UEB uncontracted)
by RnibThis page shows an image of bomb damaged houses surrounded by an image border. There is a locator dot shown, which will be at the top left of the page when the image is the correct way up. There are three terraced houses and an old fashioned lamp post. The house in the middle is nearly completely destroyed. Only part of a window with broken glass remains to the left of the open doorway. The lamp post is in front of this house and leans precariously to the left. The house on the left is only damaged upstairs. Some of the roof slates have been blown off exposing some of the roof timber. Some of the wall to the room above the front door is missing. The house on the right is damaged upstairs and downstairs. Lots of the roof slates have been blown off also exposing some of the roof timber. The left upstairs window is half missing with broken glass. Most of this room is missing. The downstairs room is half missing. Its window is intact although the glass is cracked. To the right the front door and the window above are not damaged.
World War II bombed street (UEB contracted)
by RnibThis page shows an image of bomb damaged houses surrounded by an image border. There is a locator dot shown, which will be at the top left of the page when the image is the correct way up. There are three terraced houses and an old fashioned lamp post. The house in the middle is nearly completely destroyed. Only part of a window with broken glass remains to the left of the open doorway. The lamp post is in front of this house and leans precariously to the left. The house on the left is only damaged upstairs. Some of the roof slates have been blown off exposing some of the roof timber. Some of the wall to the room above the front door is missing. The house on the right is damaged upstairs and downstairs. Lots of the roof slates have been blown off also exposing some of the roof timber. The left upstairs window is half missing with broken glass. Most of this room is missing. The downstairs room is half missing. Its window is intact although the glass is cracked. To the right the front door and the window above are not damaged.
World War II bombed street (large print)
by RnibThis page shows an image of bomb damaged houses surrounded by an image border. There is a locator dot shown, which will be at the top left of the page when the image is the correct way up. There are three terraced houses and an old fashioned lamp post. The house in the middle is nearly completely destroyed. Only part of a window with broken glass remains to the left of the open doorway. The lamp post is in front of this house and leans precariously to the left. The house on the left is only damaged upstairs. Some of the roof slates have been blown off exposing some of the roof timber. Some of the wall to the room above the front door is missing. The house on the right is damaged upstairs and downstairs. Lots of the roof slates have been blown off also exposing some of the roof timber. The left upstairs window is half missing with broken glass. Most of this room is missing. The downstairs room is half missing. Its window is intact although the glass is cracked. To the right the front door and the window above are not damaged.
Vulcan - Long-range Medium Bomber (UEB uncontracted)
by RnibThis is an image of a jet bomber seen from above. There is a locator dot shown, which will be at the top left of the page when the image is the correct way up. The image is in the centre and a scale in metres on the left of the page. The aircraft nose is in the top centre and the tail in the bottom centre of the page. The fuselage goes up and down the middle of the page. The cockpit is shown as a tiny window near the nose. The wings sweep down to the left and right and are widest at the tail end. Sticking out from the end of the aircraft there are two jet engine nozzles to the left and right of the tail. The bottom edge of the wing has four flaps on each side, these are the ailerons used to manoeuvre the aircraft when it is flying.
Vulcan - Long-range Medium Bomber (UEB contracted)
by RnibThis is an image of a jet bomber seen from above. There is a locator dot shown, which will be at the top left of the page when the image is the correct way up. The image is in the centre and a scale in metres on the left of the page. The aircraft nose is in the top centre and the tail in the bottom centre of the page. The fuselage goes up and down the middle of the page. The cockpit is shown as a tiny window near the nose. The wings sweep down to the left and right and are widest at the tail end. Sticking out from the end of the aircraft there are two jet engine nozzles to the left and right of the tail. The bottom edge of the wing has four flaps on each side, these are the ailerons used to manoeuvre the aircraft when it is flying.
Vulcan - Long-range Medium Bomber (large print)
by RnibThis is an image of a jet bomber seen from above. There is a locator dot shown, which will be at the top left of the page when the image is the correct way up. The image is in the centre and a scale in metres on the left of the page. The aircraft nose is in the top centre and the tail in the bottom centre of the page. The fuselage goes up and down the middle of the page. The cockpit is shown as a tiny window near the nose. The wings sweep down to the left and right and are widest at the tail end. Sticking out from the end of the aircraft there are two jet engine nozzles to the left and right of the tail. The bottom edge of the wing has four flaps on each side, these are the ailerons used to manoeuvre the aircraft when it is flying.
Second World War Recruitment Poster - "Together" (tactile)
by RnibThis poster was used throughout the Empire and Commonwealth to recruit people to fight with Britain in the Second World War. Men and women came to the UK to work in industry, nursing and the armed forces as volunteers. Over 3 million people supported the UK in the armed forces of the Commonwealth. Almost 2.5 million Indians volunteered to help Britain fight. This is the largest volunteer army in history. Just under half of today's black and Asian population in the UK originate from cultural and ethnic groups that served and worked here during the Second World War. Description of the poster This coloured recruitment poster looks like a painting and shows seven fully uniformed members from the Commonwealth marching together under a flying Union Jack flag. The head-to-waist images of the men are shown in three diagonal rows - three at the front, two in the middle and two at the back. All are facing towards the right of the poster and are carrying rifles over their left shoulders with the rifle butt supported by their left hands. The front row, from left to right, has a Canadian airman (blue uniform), an Australian soldier (khaki uniform), and a British Navy sailor (navy uniform). The middle row, from left to right, has a South African soldier (cream uniform) and a New Zealand soldier (khaki uniform). The back row, from left to right, has a West African soldier (cream uniform) and an Indian soldier (khaki uniform). All men are white and clean-shaven, except the West African soldier, who is black, and the Indian soldier, who dark skinned with a beard. It is each man's uniform hat that distinguishes him and his country. Colour is used in the poster to represent the red, white and blue of the Union Jack and the colours on the men's uniforms. The poster has a white border with a large black band across the bottom that contains the word "together" in yellow capitals. The only other readable words on the poster are "Canada" on the sleeve badge of the Canadian airman and "H.M.S. Victory" on the headband of the British Navy sailor.
JU 87 Stuka Dive Bomber (UEB uncontracted)
by RnibThis page shows two images of an aircraft. At the top of the page seen from the side and in the bottom and middle of the page a plan view seen from above. There is a locator dot shown, which will be at the top left of the page when the image is the correct way up. Both views have the front on the left and the tail on the right of the page. The aircraft is shown in a flying position. The aircraft in the top of the page has the propeller on the left with one blade pointing up and one pointing down. The tip of the nose cone is yellow on the large print image. Up and right there is a notch in the fuselage, this is the air intake for the engine. Down from this is a rectangle which comprises six exhaust outlets. The bottom left of the front of the aircraft nose has a notch. This is the air intake for the radiator. To the right, down from the exhaust, are outlets for hot air to escape. In the top centre of the image is the cockpit cover. It has an aerial sticking up. Poking up and right is a gun the rear gunner would use if the aircraft was attacked. Down from the cockpit is the wingtip and mainly underside of the wing. The wings on this aircraft are angled down a short way as they leave the fuselage. They then kink upwards towards the tip of the wing, allowing the underside to be found. One of the two front wheels is shown down from the wing. The wheel is largely hidden by the streamlined wheel cover. A single large bomb is attached under the cockpit between the wheels. The leg of the wheel hides the central part of the bomb. Right of the wing the fuselage continues to the vertical tail fin on the right. In the centre of this section is a cross identifying the plane as German. In the centre of the fin is the end of one of the tail wings. Right of this is a vertical flap. This is one of the ailerons used to manoeuvre the aircraft when it is flying. Down from the fin is the single small tail wheel. In the plan view image in the bottom and middle of the page the fuselage goes from left to right in the centre of the image. The main wings go up and down the page from the fuselage. In the left of the page the propeller has one blade pointing up and one pointing down. The tip of the nose cone is yellow on the large print image. To the right of the propeller six exhaust outlets can be found on the top and bottom edge of the fuselage. Right of this are the wings. On the wings near the fuselage there is a horizontal line which is where the wing kinks. Towards the tips of each wing there is a cross identifying the plane as German. The trailing edge of the wings on the right has flaps which are the automatic airbrakes used to take the aircraft out of a dive so it does not crash. In the centre of the fuselage between the wings is the cockpit. The fuselage continues to the right ending in the tailplane. On the right of each tail wing is a flap. These are two of the ailerons used to manoeuvre the aircraft when it is flying.
JU 87 Stuka Dive Bomber (UEB contracted)
by RnibThis page shows two images of an aircraft. At the top of the page seen from the side and in the bottom and middle of the page a plan view seen from above. There is a locator dot shown, which will be at the top left of the page when the image is the correct way up. Both views have the front on the left and the tail on the right of the page. The aircraft is shown in a flying position. The aircraft in the top of the page has the propeller on the left with one blade pointing up and one pointing down. The tip of the nose cone is yellow on the large print image. Up and right there is a notch in the fuselage, this is the air intake for the engine. Down from this is a rectangle which comprises six exhaust outlets. The bottom left of the front of the aircraft nose has a notch. This is the air intake for the radiator. To the right, down from the exhaust, are outlets for hot air to escape. In the top centre of the image is the cockpit cover. It has an aerial sticking up. Poking up and right is a gun the rear gunner would use if the aircraft was attacked. Down from the cockpit is the wingtip and mainly underside of the wing. The wings on this aircraft are angled down a short way as they leave the fuselage. They then kink upwards towards the tip of the wing, allowing the underside to be found. One of the two front wheels is shown down from the wing. The wheel is largely hidden by the streamlined wheel cover. A single large bomb is attached under the cockpit between the wheels. The leg of the wheel hides the central part of the bomb. Right of the wing the fuselage continues to the vertical tail fin on the right. In the centre of this section is a cross identifying the plane as German. In the centre of the fin is the end of one of the tail wings. Right of this is a vertical flap. This is one of the ailerons used to manoeuvre the aircraft when it is flying. Down from the fin is the single small tail wheel. In the plan view image in the bottom and middle of the page the fuselage goes from left to right in the centre of the image. The main wings go up and down the page from the fuselage. In the left of the page the propeller has one blade pointing up and one pointing down. The tip of the nose cone is yellow on the large print image. To the right of the propeller six exhaust outlets can be found on the top and bottom edge of the fuselage. Right of this are the wings. On the wings near the fuselage there is a horizontal line which is where the wing kinks. Towards the tips of each wing there is a cross identifying the plane as German. The trailing edge of the wings on the right has flaps which are the automatic airbrakes used to take the aircraft out of a dive so it does not crash. In the centre of the fuselage between the wings is the cockpit. The fuselage continues to the right ending in the tailplane. On the right of each tail wing is a flap. These are two of the ailerons used to manoeuvre the aircraft when it is flying.
JU 87 Stuka Dive Bomber (large print)
by RnibThis page shows two images of an aircraft. At the top of the page seen from the side and in the bottom and middle of the page a plan view seen from above. There is a locator dot shown, which will be at the top left of the page when the image is the correct way up. Both views have the front on the left and the tail on the right of the page. The aircraft is shown in a flying position. The aircraft in the top of the page has the propeller on the left with one blade pointing up and one pointing down. The tip of the nose cone is yellow on the large print image. Up and right there is a notch in the fuselage, this is the air intake for the engine. Down from this is a rectangle which comprises six exhaust outlets. The bottom left of the front of the aircraft nose has a notch. This is the air intake for the radiator. To the right, down from the exhaust, are outlets for hot air to escape. In the top centre of the image is the cockpit cover. It has an aerial sticking up. Poking up and right is a gun the rear gunner would use if the aircraft was attacked. Down from the cockpit is the wingtip and mainly underside of the wing. The wings on this aircraft are angled down a short way as they leave the fuselage. They then kink upwards towards the tip of the wing, allowing the underside to be found. One of the two front wheels is shown down from the wing. The wheel is largely hidden by the streamlined wheel cover. A single large bomb is attached under the cockpit between the wheels. The leg of the wheel hides the central part of the bomb. Right of the wing the fuselage continues to the vertical tail fin on the right. In the centre of this section is a cross identifying the plane as German. In the centre of the fin is the end of one of the tail wings. Right of this is a vertical flap. This is one of the ailerons used to manoeuvre the aircraft when it is flying. Down from the fin is the single small tail wheel. In the plan view image in the bottom and middle of the page the fuselage goes from left to right in the centre of the image. The main wings go up and down the page from the fuselage. In the left of the page the propeller has one blade pointing up and one pointing down. The tip of the nose cone is yellow on the large print image. To the right of the propeller six exhaust outlets can be found on the top and bottom edge of the fuselage. Right of this are the wings. On the wings near the fuselage there is a horizontal line which is where the wing kinks. Towards the tips of each wing there is a cross identifying the plane as German. The trailing edge of the wings on the right has flaps which are the automatic airbrakes used to take the aircraft out of a dive so it does not crash. In the centre of the fuselage between the wings is the cockpit. The fuselage continues to the right ending in the tailplane. On the right of each tail wing is a flap. These are two of the ailerons used to manoeuvre the aircraft when it is flying.
Avro Lancaster Bomber (UEB uncontracted)
by RnibThis page shows two images of an aircraft. At the top of the page seen from the side and in the bottom and middle of the page a plan view seen from above. There is a locator dot shown, which will be at the top left of the page when the image is the correct way up. Both views have the front on the left and the tail on the right of the page. The aircraft is shown in a flying position so the front wheels are retracted and not shown. The aircraft in the top of the page has a transparent nose cone on the left which is where the bomb aimer sits. Up and right from this is the fore gunner's turret. Up and right from this again is the main cockpit cover. Down from the cockpit are two propellers. They are attached to engines which hang off the wing. To the right of the propellers is a small rectangle which comprises six exhaust outlets on the outer side of the outside engine. Right from the exhaust is the tip of the wing pointing towards you. The centre of the fuselage has letters identifying which individual aircraft it is. There is also a red and blue roundel indicating the plane belongs to the RAF. On the top edge of the fuselage there is a gun turret with the gun pointing up and to the right. Right of this the fuselage continues to one of the vertical tail fins. On the right of this is a vertical flap. This is one of the ailerons used to manoeuvre the aircraft when it is flying. The tail has a red rectangle and a blue rectangle separated by a white line indicating the plane belongs to the RAF. Down from the tail fin is the single rear wheel. To the right of the tail is the rear gun turret with the gun pointing right and down. In the plan view image in the bottom and middle of the page the fuselage goes from left to right in the centre of the image. The main wings go up and down the page from the fuselage. On the left the fuselage starts with a transparent nose cone which is where the bomb aimer sits. Right from this is the fore gunner's turret. Its guns cross above the bomb aimer. Right from this is the main cockpit cover. There are two small hatches in the centre of the fuselage and right from them is a gun turret with the guns pointing to the right. The fuselage finishes on the right with the rear gun turret with the guns pointing to the right. In the centre of the page the main wings each have two engines and propellers sticking out to the left. To the right of the propellers six exhaust outlets can be found on the top and bottom edge of each engine. Towards the end of each wing is a red and blue roundel indicating the plane belongs to the RAF. On the right of each wing tip is a flap. These are two of the ailerons used to manoeuvre the aircraft when it is flying. On the right of the page is the tailplane. The right half of each tail wing is a flap. These are two more of the ailerons used to manoeuvre the aircraft when it is flying. The ends of the tail wing, up and down the page have the ends of the two vertical fins showing. The plane is green although it was also commonly painted with camouflage colours. The underside is dark grey or black. This would mean the aircraft was difficult to detect from the ground when out on night bombing raids.
Avro Lancaster Bomber (UEB contracted)
by RnibThis page shows two images of an aircraft. At the top of the page seen from the side and in the bottom and middle of the page a plan view seen from above. There is a locator dot shown, which will be at the top left of the page when the image is the correct way up. Both views have the front on the left and the tail on the right of the page. The aircraft is shown in a flying position so the front wheels are retracted and not shown. The aircraft in the top of the page has a transparent nose cone on the left which is where the bomb aimer sits. Up and right from this is the fore gunner's turret. Up and right from this again is the main cockpit cover. Down from the cockpit are two propellers. They are attached to engines which hang off the wing. To the right of the propellers is a small rectangle which comprises six exhaust outlets on the outer side of the outside engine. Right from the exhaust is the tip of the wing pointing towards you. The centre of the fuselage has letters identifying which individual aircraft it is. There is also a red and blue roundel indicating the plane belongs to the RAF. On the top edge of the fuselage there is a gun turret with the gun pointing up and to the right. Right of this the fuselage continues to one of the vertical tail fins. On the right of this is a vertical flap. This is one of the ailerons used to manoeuvre the aircraft when it is flying. The tail has a red rectangle and a blue rectangle separated by a white line indicating the plane belongs to the RAF. Down from the tail fin is the single rear wheel. To the right of the tail is the rear gun turret with the gun pointing right and down. In the plan view image in the bottom and middle of the page the fuselage goes from left to right in the centre of the image. The main wings go up and down the page from the fuselage. On the left the fuselage starts with a transparent nose cone which is where the bomb aimer sits. Right from this is the fore gunner's turret. Its guns cross above the bomb aimer. Right from this is the main cockpit cover. There are two small hatches in the centre of the fuselage and right from them is a gun turret with the guns pointing to the right. The fuselage finishes on the right with the rear gun turret with the guns pointing to the right. In the centre of the page the main wings each have two engines and propellers sticking out to the left. To the right of the propellers six exhaust outlets can be found on the top and bottom edge of each engine. Towards the end of each wing is a red and blue roundel indicating the plane belongs to the RAF. On the right of each wing tip is a flap. These are two of the ailerons used to manoeuvre the aircraft when it is flying. On the right of the page is the tailplane. The right half of each tail wing is a flap. These are two more of the ailerons used to manoeuvre the aircraft when it is flying. The ends of the tail wing, up and down the page have the ends of the two vertical fins showing. The plane is green although it was also commonly painted with camouflage colours. The underside is dark grey or black. This would mean the aircraft was difficult to detect from the ground when out on night bombing raids.
Avro Lancaster Bomber (large print)
by RnibThis page shows two images of an aircraft. At the top of the page seen from the side and in the bottom and middle of the page a plan view seen from above. There is a locator dot shown, which will be at the top left of the page when the image is the correct way up. Both views have the front on the left and the tail on the right of the page. The aircraft is shown in a flying position so the front wheels are retracted and not shown. The aircraft in the top of the page has a transparent nose cone on the left which is where the bomb aimer sits. Up and right from this is the fore gunner's turret. Up and right from this again is the main cockpit cover. Down from the cockpit are two propellers. They are attached to engines which hang off the wing. To the right of the propellers is a small rectangle which comprises six exhaust outlets on the outer side of the outside engine. Right from the exhaust is the tip of the wing pointing towards you. The centre of the fuselage has letters identifying which individual aircraft it is. There is also a red and blue roundel indicating the plane belongs to the RAF. On the top edge of the fuselage there is a gun turret with the gun pointing up and to the right. Right of this the fuselage continues to one of the vertical tail fins. On the right of this is a vertical flap. This is one of the ailerons used to manoeuvre the aircraft when it is flying. The tail has a red rectangle and a blue rectangle separated by a white line indicating the plane belongs to the RAF. Down from the tail fin is the single rear wheel. To the right of the tail is the rear gun turret with the gun pointing right and down. In the plan view image in the bottom and middle of the page the fuselage goes from left to right in the centre of the image. The main wings go up and down the page from the fuselage. On the left the fuselage starts with a transparent nose cone which is where the bomb aimer sits. Right from this is the fore gunner's turret. Its guns cross above the bomb aimer. Right from this is the main cockpit cover. There are two small hatches in the centre of the fuselage and right from them is a gun turret with the guns pointing to the right. The fuselage finishes on the right with the rear gun turret with the guns pointing to the right. In the centre of the page the main wings each have two engines and propellers sticking out to the left. To the right of the propellers six exhaust outlets can be found on the top and bottom edge of each engine. Towards the end of each wing is a red and blue roundel indicating the plane belongs to the RAF. On the right of each wing tip is a flap. These are two of the ailerons used to manoeuvre the aircraft when it is flying. On the right of the page is the tailplane. The right half of each tail wing is a flap. These are two more of the ailerons used to manoeuvre the aircraft when it is flying. The ends of the tail wing, up and down the page have the ends of the two vertical fins showing. The plane is green although it was also commonly painted with camouflage colours. The underside is dark grey or black. This would mean the aircraft was difficult to detect from the ground when out on night bombing raids.
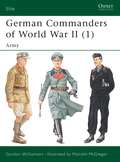
German Commanders of World War II
by Gordon Williamson and Malcolm McGregorThis first of two studies examines the careers and illustrates the appearance and uniforms of 19 of the German Army's leading field commanders in World War II. Their service covers the whole arc of that army's wartime experience, from stunning success in 1939–41, through the hugely costly middle years on the Russian Front to the stubborn defensive fighting in both East and West in 1943–45. Also included are five more junior unit commanders chosen because their service typifies the achievements of combat leaders in regimental and battalion commands. The colour portraits are in the uniquely meticulous style of the respected World War II illustrator Malcolm McGregor.
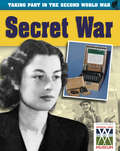
Secret War
by Ann KramerThis book looks at the many ways in which secret operations helped defeat the enemy during the Second World War. Taking Part in the Second World War offers a history of the war told through the words of the people who took part. Author Ann Kramer skilfully weaves the threads together to build up a portrait of not only the events of the war, but also of those who served future generations so well.
Wellington Square, Level 3, Set A
by Tessa KrailingPart of a series of stories and activities centred on a real neighbourhood, Wellington Square, and the people who live there. From Level 3 onwards, the stories also contain supplementary materials and suggestions dealing with non-fiction texts.
Wellington Square, Level 3, Set A
by Tessa KrailingPart of a series of stories and activities centred on a real neighbourhood, Wellington Square, and the people who live there. From Level 3 onwards, the stories also contain supplementary materials and suggestions dealing with non-fiction texts.
Duty Calls
by James HollandPilot officer Archie Jackson, 19, is in control of the RAF's newest fighter aircraft, a Supermarine Spitfire.Now he has the Luftwaffe in his sights and only one thing matters: defending Britain. Suddenly planes are falling from the sky, exploding and spiralling into the English Channel.France has fallen and the swastika flies over Occupied Europe. Only these young pilots - barely out of boyhood - stand between Britain and a Nazi invasion . . . Duty Calls: Battle of Britain, throws you deep into the heart - and horror - of Britain's darkest, and finest, hour.** Historian James Holland is the bestselling author of the Jack Tanner adult war fiction books. Duty Calls is his first series for younger readers, and showcases his expertise on the Second World War. ** James Holland presented Battle of Britain: The Real Story on BBC2.
Danny Baker Record Breaker
by Steve HartleyLike many young boys, Danny dreams of making it into the record books. Eternally optimistic, he writes to Mr Bibby, Keeper of the Records, with hilarious accounts of his yucky endeavours. In this book, Danny is going on holiday! He will attempt to break the following records. Drumroll, please. . . Sickbags filled in a single flight! (DB attempt: 13) Wriggliest bath! (DB attempt: 9,183 worms) Freckliest face! (DB attempt: 1,246 freckles - before sabotage by Mum and the Factor 5,000,000 suncream)
World War II in Britain
by Liz Gogerly'The past is all around us, if we know where to look.' This series takes a look at archaeological, structural and museum evidence from around Britain, allowing readers to build up a picture of what life was like in key historical periods and how you can discover it for yourself by visiting sites around the country.
World War One
by Clive GiffordThe book contains nine short stories dealing with different aspects of life during World War I.World War I includes the stories of flying aces such as the 'Red Baron', the story of Lawrence of Arabia and the stories of brave doctors and nurses such as Edith Cavell in German occupied Belgium.Complete with glossary, further reading section and index.
Utterly Unbelievable
by Adam FrostPrepare to discover the most utterly unbelievable REAL facts about WWII . . . Did you know that onions were given as birthday presents in WWII? Or that exploding camel dung was used as a weapon? Could a leaky toilet force a submarine crew to abandon ship?This is history like you've never known it before! Ask yourself . . .Would you eat squirrel tail soup, cow's udders, or a carrot on a stick? Could you share 12.7cm of bathwater with your WHOLE family - for your weekly wash? If you were a spy, which gadgets and inventions would you choose?From flying tanks to Operation Toenail, read about the daring, tragic and heroic events that shaped one of the most influential conflicts in modern times. With a bold design and colourful illustrations, picture the most amazing, and unbelievable, facts from this world-changing time.Puffin and IWM (Imperial War Museums) are proud to be working together to educate and inspire young readers with tales from the past. Puffin know that stories can take you anywhere. As one of the most beloved children's publishers, we aim to fire every young imagination. Uncovering people's experiences during wartime, from the First World War to the present day, IWM is a family of five museums (IWM London, Churchill War Rooms, HMS Belfast, IWM North, and IWM Duxford).
World War II
by Robert FowkeDid you know that Adolf Hilter wasn't, in fact, German?The Second World War brought horror and heartache to millions of people all over the globe, and it turned everyday living upside down too. Any history book will give you the boring facts THEY think you should know, but only this one will tell you what life during World War II was REALLY like ...

