Special Collections
Excellent Egyptians
Description: Accessible images and books for special topics
- Table View
- List View

Egyptian Gallery
by RnibEgyptian Gallery: Egyptian Boat Model. Sedment, Egypt; 2160-2025 BC; wood; 60 cm long by 11 cm wide and a total of 58 cm high including the height of the mast which is 29 cm. The earliest boats were made from reeds and later from wood. Water travel was both a part of daily life and an important religious symbol.Large ships transported heavy building stone hundreds of miles along the Nile. Cargo boats carried grain.Broad barges carried cattle from one side of the Nile to the other. Pharaohs travelled by royal barge. The sun-god Ra travelled across the sky by boat. The Egyptians sometimes left the Nile (via the river's mouth) to sail on the Mediterranean or the Red sea but mostly stayed close to the shore. This boat model is over 4000 years old. It was placed in a tomb to speed along the owner's journey to the afterlife and for them to enjoy sailing there. The boat has a flat bottom with the pointed bow (front) and stern (back) curved upwards so that they would have been out of the water. The stern is raised slightly more than the bow. About a third of the way along the boat from the bow is a mast with a furled sail wrapped around it. Ropes are attached to the top of the mast and tied at the bow and stern. The sail also has ropes attached for raising and lowering it. At the stern is a large brown steering oar and immediately in front of this oar is a white canopy on four legs. The flat white deck of the boat has 8 male figures, painted with dark brown skin, white kilts, black wigs and white and black eyes, are either standing or sitting on it, mostly in pairs, and all facing the bow. At the bow is a standing man who is holding a large white stone with black markings attached to a rope that would have been used to test the depth of the water. Behind him, just in front of the mast, are two men standing with oars laid across the deck immediately in front of them. In the centre of the boat are two men sitting holding oars as if rowing. Behind these are two men standing with their arms outstretched as if rowing. Behind these is the canopy and at the stern is a single seated man who has an oar in his hands. The oars are brown with a white paddle that is roughly diamond shaped. The tactile image shows five of the eight figures and is roughly half the size of the actual object. The boat is shown with solid texture with a rough texture for the flat deck. The figures are shown in outline with solid texture for their black wigs, a texture for their kilts, no texture for their skin and a spot for their eyes. The oars, masts and legs of canopy are shown as solid texture. The sail, stone and canopy are shown with a different texture. Fine lines show the ropes from the mast and sail.
Egyptian Gallery
by RnibThese are the four jars in which the organs removed during the mummification process are stored and preserved. The jars would have then been placed inside a canopic chest and buried with the mummy in the tomb. This was done because the dead person would need their organs for the afterlife. Each jar consists of a tall round container with a lid in the shape of the head of one of four gods that were responsible for protecting particular organs. The jar and the lid are not an exact fit so that you can clearly see the division between the two. The four gods were: Duamutef, the jackal-headed god whose jar contained the stomach; Qebehsenuef, the falcon-headed god whose jar contained the intestines; Hapi, the baboon-headed god whose jar contained the lungs; and Imsety, the human-headed god whose jar contained the liver. The canopic jars are not a matching set so vary in size and the material they are made from. 1. Qebehsenuef - origin unknown; 664-343 BC; carved limestone; 35 cm high with a diameter of 12 cm at widest point. This light stone coloured jar, the falcon has a triangular shaped face with the beak and circular eyes clearly carved. It almost looks like the falcon is wearing a hood. 2. Duamutef - on loan from The British Museum; 35cm high with a diameter of 12 cm at the widest point. Similar to Qebehsenuef, clearly carved jackal head with large pointed ears and snout with eyes, end of nose and mouth defined. A row of hieroglyphs are painted in black around the rim 3. Imsety - origin and date unknown; carved wood; 27 cm high with a diameter of 9 cm at widest point. A slimmer jar than the others, clearly carved human face surrounded by an Egyptian headdress and large ears. Two rows of carved hieroglyphs down the front. 4.Hapi - origin unknown; 664-343 BC; carved limestone; 22 cm high with a diameter of 9 cm at widest point. The baboon has a prominent snout with clearly carved eyes, nose bridge and mouth. The tactile image show all four canopic jars on one page, two at the top and two at the bottom. They are in scale with each other and are slightly less than half the size of the actual jars. Each jar is shown in outline infilled with a texture. Solid texture shows some of their feathers and the hieroglyphs.
Egyptian Gallery
by RnibOrigin unknown; 395-30 BC; mummified cat in linen bandages; 30 cm high by 8 cm wide and 7 cm deep. Animals associated with deities were regularly mummified in the later periods of Egyptian history. The cat is associated with the goddess Bastet. The cat mummy is tightly wrapped in many layers of overlapping wrappings. It has a head in the shape of a cat and a body shaped like a long cylinder with a flat bottom. The ears stick up from the head and the eyes have been added on top of the wrappings and look a bit like buttons eyes sewn in place through the centre. The tactile image is about the same size as the actual mummy and is shown in outline infilled with a texture. Further lines show some of the overlapping wrappings to give an idea of the patterning they make. A different texture shows the nose and mouth area that has been wrapped slightly differently to the rest of the cat. The eyes are shown as hollows with solid centres.
Egyptian Gallery
by RnibAmulets were magic charms worn for protection against injury or disease. The living wore them as jewellery and they covered the body of the dead to protect them in the afterlife. Amulets came in many forms. Many depicted gods so the living may have worn a figure of Bes protector of the family, whilst mummies were covered with gods of the afterlife such as Anubis or Horus. Some were the shape of body parts such as a hand or leg. These may have been magical replacements for actual limbs that had been lost or damaged. Many amulets represented a hieroglyph such as the ˜Ankh which meant life or the ˜Djed' pillar for stability. The ˜wadjat' was the eye of the god Horus and meant ˜Healthy one'. It was thought to give strong protection against evil. Scarabs were beetle-shaped charms representing rebirth and placed within the mummy's wrappings.The Heart Scarab was most important of all, covering the heart so that it did not speak out against you when you were judged by Osiris god of the underworld. (a) Djed pillar - origin unknown; 664-343 BC; faience (a ceramic made with sand); 11 cm high by 3 cm wide and 1.5 cm thick. A pale blue/green glazed pillar with a flared base and four horizontal bars at the top and looks like an electricity pylon. Tactile image is just slightly larger. (b) Bes - origin and date unknown; faience (a ceramic made with sand); 3.5 cm high by 0.6 cm wide and 0.6 cm thick. This pale blue/green glazed figure is in the shape of the dwarf god Bes and has a large head and small body with short arms and legs. Tactile image is four times larger. (c) Wadjat (or Eye of Horus for protection) - origin unknown; 945-656 BC; faience (a ceramic made with sand); 4.5 cm high by 5 cm wide and 1 cm thick. An Egyptian-style eye that has a thick outline with a pupil in the middle with the corner of the eye extended to the left. An eyebrow follows the same line as the eye and its outline extension. Below the eye is a slightly off centre 'j' shape that goes from the base of the eye just past the pupil and turns upwards below the outline extension. A further vertical pattern extends between the eye and eyebrow and between the bottom of the eye down to the base of the 'j' shape. This is also the shape of the hieroglyphic symbol for the wadjat. Most of the blue/green glaze has come off it making it look more like a stone than pottery. Tactile image is one and a half time larger. (d) Heart scarab - origin unknown; 664-343 BC; faience (a ceramic made with sand); 14.5 cm long by 8 cm high and 1 cm thick. This has the body of a scarab or dung beetle with falcon wings on either side. The wings are attached through small holes in the scarab and wings by fine cord. The scarab has the distinctive shape - head, thorax and abdomen divided by two lines, one across and one down to show where the wings would emerge for flying. The wings have a straight top with rounded sides and base. The heart scarab is pale blue with black markings on the wings to denote the primary feathers. Tactile image is just slightly smaller. The tactile image shows the three amulets and heart scarab on one page. All are shown in outline infilled with a texture. Further lines and solid texture show some of their detail.
Egyptian Gallery
by RnibHawara, Egypt, AD 80-120, excavated in 1888 by Flinders Petrie; cartonnage, like papier mache but using linen and plaster of paris covered in gold leaf with the inner surface painted; 45 cm high by 34 cm wide and 24 cm deep (from back of head to tip of nose). This is a 2,000-year-old mummy mask from the Roman period. It shows the face of a man whose name we know, because it's written on the mask: Titos Flavios Demetrios. He was living in Egypt but was of Greek descent - descended from the soldiers Alexander the Great had put into Egypt. What we don't know is how he became a Roman citizen. The gold mask was designed to fit over the head of the mummy a bit like a large helmet and was to give the dead person the powers of gods and thus helping them with their journey to the afterlife. The face is carefully moulded with the facial features clearly shown. The eyes, painted white with black outline, pupils and eyebrows, stare directly at you. Surrounding the face is a long headdress, similar in style to Lady Tahathor that forms the outer edges of the mask. This mask shows in raised relief Osiris on his throne, with Isis and Nephthys acting as mourners. On either side are birds, the hawk god Horus and Ba or soul-bird. At the base are eight underworld gods wearing sun discs and holding feathers to observe Anubis attending to the mummy of Titos. The inner surface of the mask, not designed to have been seen, is left undecorated. The tactile image shows the side view of the mask to show how it would have fitted over the mummy and the shape of the face. It is about half the size of the actual mask. The shape of the mask and facial features are outlined with a texture for the headdress. Thinner lines, a different texture and solid texture show some of the raised relief on the headdress. Solid texture also shows the eyebrow, eye and mouth.

Egyptian Tales
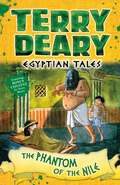
by Terry Deary and Helen FlookFrom the bestselling author of Horrible Histories...Tutankhamen has been buried in his rocky tomb. But there is a plot to rob the grave of its vast wealth as soon as possible after the funeral. A motley gang of villains have all the skills they need to undertake the crime - the key member of the team is young Paneb, who is small and lithe and the only one who can slip through the tunnel and into the funeral chamber. It's a risky venture, because, if he's caught, the punishment is slow torture and death.Terry Deary's Egyptian Tales explore the world of Ancient Egypt through the eyes of children who could have lived at the time. These stories feature real people and take place in some of the most recognisable Egyptian settings. This new edition features notes for the reader to help extend learning and exploration of the historical period.

Egyptian Tales
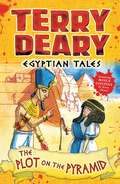
by Terry DearyFrom the bestselling author of Horrible Histories...The Great Pyramid is a lively place to work. The only irritation is Antef, the fussy, bullying supervisor who makes everyone feel more like slaves than free workers. So, when Antef disappears, the workers are blamed. The only witness is yong Dafia. Can she decides to come up with a plan to clear the men's names?Terry Deary's Egyptian Tales explore the world of Ancient Egypt through the eyes of children who could have lived at the time. These stories feature real people and take place in some of the most recognisable Egyptian settings. This new edition features notes for the reader to help extend learning and exploration of the historical period.
Egyptian Tales
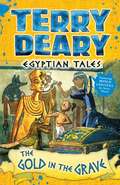
by Terry DearyFrom the bestselling author of Horrible Histories...Menes is training as a scribe in the local temple, and to earn extra money to help his poor family, he agrees to assist rich old Maiarch. Menes must write a prayer to rid Maiarch of an old family ghost. But what if the ghost is actually more human than supernatural? It will take all of Menes's skill and ingenuity to find out the truth...Terry Deary's Egyptian Tales explore the world of Ancient Egypt through the eyes of children who could have lived at the time. These stories feature real people and take place in some of the most recognisable Egyptian settings. This new edition features notes for the reader to help extend learning and exploration of the historical period.
Egyptian Tales
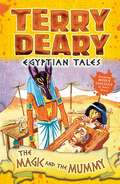
by Terry Deary and Helen FlookFrom the bestselling author of Horrible Histories...This is a tale of Neria, who works in the House of Death helping her father to make mummies. Neria enjoys her work, but when the pharaoh dies, everyone is so busy that Neria is given the responsibility of mummifying the pharaoh's cat, to accompany him to the afterlife. The trouble is, Neria doesn't want to kill and gut the cat! Can she find a way to save it - without being caught and punished?Terry Deary's Egyptian Tales explore the world of Ancient Egypt through the eyes of children who could have lived at the time. These stories feature real people and take place in some of the most recognisable Egyptian settings. This new edition features notes for the reader to help extend learning and exploration of the historical period.
Egyptian Tales
by Terry DearyFrom the bestselling author of Horrible Histories...Menes is training as a scribe in the local temple, and to earn extra money to help his poor family, he agrees to assist rich old Maiarch. Menes must write a prayer to rid Maiarch of an old family ghost. But what if the ghost is actually more human than supernatural? It will take all of Menes's skill and ingenuity to find out the truth...Terry Deary's Egyptian Tales explore the world of Ancient Egypt through the eyes of children who could have lived at the time. These stories feature real people and take place in some of the most recognisable Egyptian settings. This new edition features notes for the reader to help extend learning and exploration of the historical period.
Egyptian Tales
by Terry DearyFrom the bestselling author of Horrible Histories...The Great Pyramid is a lively place to work. The only irritation is Antef, the fussy, bullying supervisor who makes everyone feel more like slaves than free workers. So, when Antef disappears, the workers are blamed. The only witness is yong Dafia. Can she decides to come up with a plan to clear the men's names?Terry Deary's Egyptian Tales explore the world of Ancient Egypt through the eyes of children who could have lived at the time. These stories feature real people and take place in some of the most recognisable Egyptian settings. This new edition features notes for the reader to help extend learning and exploration of the historical period.
Egyptian Tales
by Terry Deary and Helen FlookFrom the bestselling author of Horrible Histories...Tutankhamen has been buried in his rocky tomb. But there is a plot to rob the grave of its vast wealth as soon as possible after the funeral. A motley gang of villains have all the skills they need to undertake the crime - the key member of the team is young Paneb, who is small and lithe and the only one who can slip through the tunnel and into the funeral chamber. It's a risky venture, because, if he's caught, the punishment is slow torture and death.Terry Deary's Egyptian Tales explore the world of Ancient Egypt through the eyes of children who could have lived at the time. These stories feature real people and take place in some of the most recognisable Egyptian settings. This new edition features notes for the reader to help extend learning and exploration of the historical period.
Egyptian hieroglyphs (UEB uncontracted)
by RnibThis is a multi page image set on two pages with nine hieroglyphs on each page. A locator dot and title are shown on both pages. These must always be at the top left of the page when the image is the right way up. Nine Egyptian hieroglyphs. Nine Egyptian hieroglyphs are shown on this page. They are arranged in three columns of three images. Each hieroglyph has a label above or to its right, showing what is depicted in the symbol, and what letter or letters it represents. At the top left is a forearm representing "a". The hand is to the left and elbow to the right, with part of the upper arm shown above it. Down from this is the foot which represents ""b"". It is a side view with the toes to the left and the heel to the right. Part of the lower leg is shown going up the page from the heel. At the bottom left there is a tethered rope symbol representing "ch". It shows a rope which folds on the right and has two loops on the left. At the top centre of the page is the hand symbol which represents "d". This shows a hand with the wrist to the right and the straight thumb and fingers to the left. Down from the hand is the vulture symbol which symbolises "e". This is a side view of a vulture which faces to the left. One of its eyes can be found along with a curved beak. Its body is partially covered by a folded wing, and both legs are shown. Its tail droops towards the bottom right of the image. At the bottom centre is the pot stand symbol representing "g". This is a side view with a line across the top and bottom of the shape, and a triangular opening in the bottom centre. In the top right corner is a rope symbol which represents "h". The ends of the rope are at the bottom of the symbol. The rope is loosely twisted around itself, ending in a loop at the top. Down from the rope is the shelter symbol also representing "h". It is like a simple floor plan with the entrance in the bottom left of the symbol and the walls shown as a thick line. At the bottom right of the page is the reed leaf symbol which represents "i". The stem at the bottom of the symbol leads up to the blade-shaped leaf. Another nine Egyptian hieroglyphs. This page depicts nine more Egyptian hieroglyphs in three columns of three images. Each hieroglyph has a label above or to its right showing what is depicted in the symbol, and what letter or letters it represents. At the top left of the page is the cobra symbol representing "j". The snake is viewed from the side, with its head at the top left, and long body curving down and right. Down from this is the basket symbol representing "k". The basket is seen from the side, with four layers showing which get wider towards the top. A handle extends out to the right from the top layer. At the bottom left is the water symbol representing "n". It is a thick zigzag line. At the top centre of the page is the stool symbol representing "p". It is a view from above, looking down onto the stripe-patterned seat. Down from this is the folded cloth symbol representing "s". It is a simple vertical line which curves back on itself at the top. At the bottom centre is the bread loaf symbol which represents "t". The loaf is represented by a simple semi-circle. In the top right corner is the sieve symbol representing "th". It is an open circle with horizontal lines. Down from this is the cow's belly symbol representing "th". It has an oval at the right which is joined to a circle with six spikes at its left. At the bottom right is the door bolt symbol representing "z". It is a long thin horizontal shape with two short vertical lines crossing it towards the middle.
Egyptian hieroglyphs (UEB contracted)
by RnibThis is a multi page image set on two pages with nine hieroglyphs on each page. A locator dot and title are shown on both pages. These must always be at the top left of the page when the image is the right way up. Nine Egyptian hieroglyphs. Nine Egyptian hieroglyphs are shown on this page. They are arranged in three columns of three images. Each hieroglyph has a label above or to its right, showing what is depicted in the symbol, and what letter or letters it represents. At the top left is a forearm representing "a". The hand is to the left and elbow to the right, with part of the upper arm shown above it. Down from this is the foot which represents ""b"". It is a side view with the toes to the left and the heel to the right. Part of the lower leg is shown going up the page from the heel. At the bottom left there is a tethered rope symbol representing "ch". It shows a rope which folds on the right and has two loops on the left. At the top centre of the page is the hand symbol which represents "d". This shows a hand with the wrist to the right and the straight thumb and fingers to the left. Down from the hand is the vulture symbol which symbolises "e". This is a side view of a vulture which faces to the left. One of its eyes can be found along with a curved beak. Its body is partially covered by a folded wing, and both legs are shown. Its tail droops towards the bottom right of the image. At the bottom centre is the pot stand symbol representing "g". This is a side view with a line across the top and bottom of the shape, and a triangular opening in the bottom centre. In the top right corner is a rope symbol which represents "h". The ends of the rope are at the bottom of the symbol. The rope is loosely twisted around itself, ending in a loop at the top. Down from the rope is the shelter symbol also representing "h". It is like a simple floor plan with the entrance in the bottom left of the symbol and the walls shown as a thick line. At the bottom right of the page is the reed leaf symbol which represents "i". The stem at the bottom of the symbol leads up to the blade-shaped leaf. Another nine Egyptian hieroglyphs. This page depicts nine more Egyptian hieroglyphs in three columns of three images. Each hieroglyph has a label above or to its right showing what is depicted in the symbol, and what letter or letters it represents. At the top left of the page is the cobra symbol representing "j". The snake is viewed from the side, with its head at the top left, and long body curving down and right. Down from this is the basket symbol representing "k". The basket is seen from the side, with four layers showing which get wider towards the top. A handle extends out to the right from the top layer. At the bottom left is the water symbol representing "n". It is a thick zigzag line. At the top centre of the page is the stool symbol representing "p". It is a view from above, looking down onto the stripe-patterned seat. Down from this is the folded cloth symbol representing "s". It is a simple vertical line which curves back on itself at the top. At the bottom centre is the bread loaf symbol which represents "t". The loaf is represented by a simple semi-circle. In the top right corner is the sieve symbol representing "th". It is an open circle with horizontal lines. Down from this is the cow's belly symbol representing "th". It has an oval at the right which is joined to a circle with six spikes at its left. At the bottom right is the door bolt symbol representing "z". It is a long thin horizontal shape with two short vertical lines crossing it towards the middle.
Egyptian citizens (UEB contracted)
by RnibIn this image showing Egyptian citizens, there is a man at the left of the page and a woman at the right. Both are standing and facing forwards so that all their facial features can be seen. A locator dot and title are shown. These must always be at the top left of the page when the image is the right way up. In the top left is the man's head, and he is smiling. He is wearing a simple headdress composed of a piece of cloth held in place by a band. Down the page are his bare shoulders and chest and he holds his arms out to the sides of his body. Around his waist he wears a simple linen loin cloth tied in place by a sash. Down from this are the man's bare legs and feet.The woman's head is at the top right. She also has a smiling face, and her long hair is held in place by a simple hair band. Around her shoulders she wears a large jewelled collar. Her bare arms are held out to the sides of her body, and she wears a bracelet on each wrist. Her full length linen dress reaches down to her ankles at the bottom of the page, and she wears plain leather sandals on her feet.
Egyptian citizens (large print)
by RnibIn this image showing Egyptian citizens, there is a man at the left of the page and a woman at the right. Both are standing and facing forwards so that all their facial features can be seen. A locator dot and title are shown. These must always be at the top left of the page when the image is the right way up. In the top left is the man's head, and he is smiling. He is wearing a simple headdress composed of a piece of cloth held in place by a band. Down the page are his bare shoulders and chest and he holds his arms out to the sides of his body. Around his waist he wears a simple linen loin cloth tied in place by a sash. Down from this are the man's bare legs and feet.The woman's head is at the top right. She also has a smiling face, and her long hair is held in place by a simple hair band. Around her shoulders she wears a large jewelled collar. Her bare arms are held out to the sides of her body, and she wears a bracelet on each wrist. Her full length linen dress reaches down to her ankles at the bottom of the page, and she wears plain leather sandals on her feet.
Egyptian citizens (UEB uncontracted)
by RnibIn this image showing Egyptian citizens, there is a man at the left of the page and a woman at the right. Both are standing and facing forwards so that all their facial features can be seen. A locator dot and title are shown. These must always be at the top left of the page when the image is the right way up. In the top left is the man's head, and he is smiling. He is wearing a simple headdress composed of a piece of cloth held in place by a band. Down the page are his bare shoulders and chest and he holds his arms out to the sides of his body. Around his waist he wears a simple linen loin cloth tied in place by a sash. Down from this are the man's bare legs and feet.The woman's head is at the top right. She also has a smiling face, and her long hair is held in place by a simple hair band. Around her shoulders she wears a large jewelled collar. Her bare arms are held out to the sides of her body, and she wears a bracelet on each wrist. Her full length linen dress reaches down to her ankles at the bottom of the page, and she wears plain leather sandals on her feet.
Egyptian hieroglyphs (large print)
by RnibThis is a multi page image set on two pages with nine hieroglyphs on each page. A locator dot and title are shown on both pages. These must always be at the top left of the page when the image is the right way up. Nine Egyptian hieroglyphs. Nine Egyptian hieroglyphs are shown on this page. They are arranged in three columns of three images. Each hieroglyph has a label above or to its right, showing what is depicted in the symbol, and what letter or letters it represents. At the top left is a forearm representing "a". The hand is to the left and elbow to the right, with part of the upper arm shown above it. Down from this is the foot which represents ""b"". It is a side view with the toes to the left and the heel to the right. Part of the lower leg is shown going up the page from the heel. At the bottom left there is a tethered rope symbol representing "ch". It shows a rope which folds on the right and has two loops on the left. At the top centre of the page is the hand symbol which represents "d". This shows a hand with the wrist to the right and the straight thumb and fingers to the left. Down from the hand is the vulture symbol which symbolises "e". This is a side view of a vulture which faces to the left. One of its eyes can be found along with a curved beak. Its body is partially covered by a folded wing, and both legs are shown. Its tail droops towards the bottom right of the image. At the bottom centre is the pot stand symbol representing "g". This is a side view with a line across the top and bottom of the shape, and a triangular opening in the bottom centre. In the top right corner is a rope symbol which represents "h". The ends of the rope are at the bottom of the symbol. The rope is loosely twisted around itself, ending in a loop at the top. Down from the rope is the shelter symbol also representing "h". It is like a simple floor plan with the entrance in the bottom left of the symbol and the walls shown as a thick line. At the bottom right of the page is the reed leaf symbol which represents "i". The stem at the bottom of the symbol leads up to the blade-shaped leaf. Another nine Egyptian hieroglyphs. This page depicts nine more Egyptian hieroglyphs in three columns of three images. Each hieroglyph has a label above or to its right showing what is depicted in the symbol, and what letter or letters it represents. At the top left of the page is the cobra symbol representing "j". The snake is viewed from the side, with its head at the top left, and long body curving down and right. Down from this is the basket symbol representing "k". The basket is seen from the side, with four layers showing which get wider towards the top. A handle extends out to the right from the top layer. At the bottom left is the water symbol representing "n". It is a thick zigzag line. At the top centre of the page is the stool symbol representing "p". It is a view from above, looking down onto the stripe-patterned seat. Down from this is the folded cloth symbol representing "s". It is a simple vertical line which curves back on itself at the top. At the bottom centre is the bread loaf symbol which represents "t". The loaf is represented by a simple semi-circle. In the top right corner is the sieve symbol representing "th". It is an open circle with horizontal lines. Down from this is the cow's belly symbol representing "th". It has an oval at the right which is joined to a circle with six spikes at its left. At the bottom right is the door bolt symbol representing "z". It is a long thin horizontal shape with two short vertical lines crossing it towards the middle.
Egyptian Gallery
by RnibLuxor, Egypt; 664-343 BC; painted wood; 122 cm long by 50 cm wide and 40 cm high. Lady Tahathor was a wealthy lady who lived and died in Luxor about 2,500 years ago. Her mummy inside its mummy case was bought as a tourist souvenir by Mr G. Errington of Colchester who brought it back to England in the 1850s before donating it to Colchester Museum in 1871. The mummy case is richly painted. The colours survive particularly well because unusually the coffin maker did not varnish the case which can lead to yellow discoloration. The coffin is painted with symbols to protect the mummy within. The chest area is covered in repeating lines of feathers. Against these is painted a winged goddess of protection with her wings outstretched. Another winged goddess is painted again across the top of the feet. Rows of gods and goddesses are seen holding feathers to observe Anubis attending to the mummy of Lady Tahathor which is shown laid on a funeral bier. Her pale pink face is carefully sculptured with facial detail painted on. Her large almond-shaped eyes are in typical Egyptian style - large black circular pupils on a white background surrounded by a thick black line that extends slightly at each corner. Surrounding her face is a long striped gold and blue headdress that is tucked behind her sculptured ears. A very short fringe runs across her forehead just below the headdress. The ears are highlighted with black lines including a black spot where an earring would go. Between the headdress on her chest is patterning in horizontal lines in green, red, gold and blue. The tactile image is a close-up of the face of Lady Tahathor to nearly the end of the headress and is about half the size of the face on the mummy case. Her facial features are shown in outline with no texture for her skin. Her eyes and eyebrows are shown with solid texture along with her lips. A texture shows the blue stripes on her headdress with no texture for the gold stripes. The patterning on her chest is shown with texture and solid shapes.
Egyptian hieroglyphs (UEB Uncontracted)
byThis is a multi page image set on two pages with nine hieroglyphs on each page. A locator dot and title are shown on both pages. These must always be at the top left of the page when the image is the right way up. Nine Egyptian hieroglyph: Nine Egyptian hieroglyphs are shown on this page. They are arranged in three columns of three images. Each hieroglyph has a label above or to its right, showing what is depicted in the symbol, and what letter or letters it represents. At the top left is a forearm representing a. The hand is to the left and elbow to the right, with part of the upper arm shown above it. Down from this is the foot which represents b. It is a side view with the toes to the left and the heel to the right. Part of the lower leg is shown going up the page from the heel. At the bottom left there is a tethered rope symbol representing ch. It shows a rope which folds on the right and has two loops on the left. At the top centre of the page is the hand symbol which represents d. This shows a hand with the wrist to the right and the straight thumb and fingers to the left. Down from the hand is the vulture symbol which symbolises e. This is a side view of a vulture which faces to the left. One of its eyes can be found along with a curved beak. Its body is partially covered by a folded wing, and both legs are shown. Its tail droops towards the bottom right of the image. At the bottom centre is the pot stand symbol representing g. This is a side view with a line across the top and bottom of the shape, and a triangular opening in the bottom centre. In the top right corner is a rope symbol which represents h. The ends of the rope are at the bottom of the symbol. The rope is loosely twisted around itself, ending in a loop at the top. Down from the rope is the shelter symbol also representing h. It is like a simple floor plan with the entrance in the bottom left of the symbol and the walls shown as a thick line. At the bottom right of the page is the reed leaf symbol which represents i. The stem at the bottom of the symbol leads up to the blade-shaped leaf. Another nine Egyptian hieroglyphs: This page depicts nine more Egyptian hieroglyphs in three columns of three images. Each hieroglyph has a label above or to its right showing what is depicted in the symbol, and what letter or letters it represents. At the top left of the page is the cobra symbol representing j. The snake is viewed from the side, with its head at the top left, and long body curving down and right. Down from this is the basket symbol representing k. The basket is seen from the side, with four layers showing which get wider towards the top. A handle extends out to the right from the top layer. At the bottom left is the water symbol representing n. It is a thick zigzag line. At the top centre of the page is the stool symbol representing p. It is a view from above, looking down onto the stripe-patterned seat. Down from this is the folded cloth symbol representing s. It is a simple vertical line which curves back on itself at the top. At the bottom centre is the bread loaf symbol which represents t. The loaf is represented by a simple semi-circle. In the top right corner is the sieve symbol representing th. It is an open circle with horizontal lines. Down from this is the cow's belly symbol representing th. It has an oval at the right which is joined to a circle with six spikes at its left. At the bottom right is the door bolt symbol representing z. It is a long thin horizontal shape with two short vertical lines crossing it towards the middle.
Egyptian citizens (UEB Contracted)
byIn this image showing Egyptian citizens, there is a man at the left of the page and a woman at the right. Both are standing and facing forwards so that all their facial features can be seen. A locator dot and title are shown. These must always be at the top left of the page when the image is the right way up.In the top left is the man's head, and he is smiling. He is wearing a simple headdress composed of a piece of cloth held in place by a band. Down the page are his bare shoulders and chest and he holds his arms out to the sides of his body. Around his waist he wears a simple linen loin cloth tied in place by a sash. Down from this are the man's bare legs and feet.The woman's head is at the top right. She also has a smiling face, and her long hair is held in place by a simple hair band. Around her shoulders she wears a large jewelled collar. Her bare arms are held out to the sides of her body, and she wears a bracelet on each wrist. Her full length linen dress reaches down to her ankles at the bottom of the page, and she wears plain leather sandals on her feet.
Egyptian hieroglyphs (UEB Contracted)
byThis is a multi page image set on two pages with nine hieroglyphs on each page. A locator dot and title are shown on both pages. These must always be at the top left of the page when the image is the right way up. Nine Egyptian hieroglyph: Nine Egyptian hieroglyphs are shown on this page. They are arranged in three columns of three images. Each hieroglyph has a label above or to its right, showing what is depicted in the symbol, and what letter or letters it represents. At the top left is a forearm representing a. The hand is to the left and elbow to the right, with part of the upper arm shown above it. Down from this is the foot which represents b. It is a side view with the toes to the left and the heel to the right. Part of the lower leg is shown going up the page from the heel. At the bottom left there is a tethered rope symbol representing ch. It shows a rope which folds on the right and has two loops on the left. At the top centre of the page is the hand symbol which represents d. This shows a hand with the wrist to the right and the straight thumb and fingers to the left. Down from the hand is the vulture symbol which symbolises e. This is a side view of a vulture which faces to the left. One of its eyes can be found along with a curved beak. Its body is partially covered by a folded wing, and both legs are shown. Its tail droops towards the bottom right of the image. At the bottom centre is the pot stand symbol representing g. This is a side view with a line across the top and bottom of the shape, and a triangular opening in the bottom centre. In the top right corner is a rope symbol which represents h. The ends of the rope are at the bottom of the symbol. The rope is loosely twisted around itself, ending in a loop at the top. Down from the rope is the shelter symbol also representing h. It is like a simple floor plan with the entrance in the bottom left of the symbol and the walls shown as a thick line. At the bottom right of the page is the reed leaf symbol which represents i. The stem at the bottom of the symbol leads up to the blade-shaped leaf. Another nine Egyptian hieroglyphs: This page depicts nine more Egyptian hieroglyphs in three columns of three images. Each hieroglyph has a label above or to its right showing what is depicted in the symbol, and what letter or letters it represents. At the top left of the page is the cobra symbol representing j. The snake is viewed from the side, with its head at the top left, and long body curving down and right. Down from this is the basket symbol representing k. The basket is seen from the side, with four layers showing which get wider towards the top. A handle extends out to the right from the top layer. At the bottom left is the water symbol representing n. It is a thick zigzag line. At the top centre of the page is the stool symbol representing p. It is a view from above, looking down onto the stripe-patterned seat. Down from this is the folded cloth symbol representing s. It is a simple vertical line which curves back on itself at the top. At the bottom centre is the bread loaf symbol which represents t. The loaf is represented by a simple semi-circle. In the top right corner is the sieve symbol representing th. It is an open circle with horizontal lines. Down from this is the cow's belly symbol representing th. It has an oval at the right which is joined to a circle with six spikes at its left. At the bottom right is the door bolt symbol representing z. It is a long thin horizontal shape with two short vertical lines crossing it towards the middle.
Egyptian citizens (UEB Uncontracted)
byIn this image showing Egyptian citizens, there is a man at the left of the page and a woman at the right. Both are standing and facing forwards so that all their facial features can be seen. A locator dot and title are shown. These must always be at the top left of the page when the image is the right way up.In the top left is the man's head, and he is smiling. He is wearing a simple headdress composed of a piece of cloth held in place by a band. Down the page are his bare shoulders and chest and he holds his arms out to the sides of his body. Around his waist he wears a simple linen loin cloth tied in place by a sash. Down from this are the man's bare legs and feet.The woman's head is at the top right. She also has a smiling face, and her long hair is held in place by a simple hair band. Around her shoulders she wears a large jewelled collar. Her bare arms are held out to the sides of her body, and she wears a bracelet on each wrist. Her full length linen dress reaches down to her ankles at the bottom of the page, and she wears plain leather sandals on her feet.
Egyptian hieroglyphs (Large Print)
byThis is a multi page image set on two pages with nine hieroglyphs on each page. A locator dot and title are shown on both pages. These must always be at the top left of the page when the image is the right way up. Nine Egyptian hieroglyph: Nine Egyptian hieroglyphs are shown on this page. They are arranged in three columns of three images. Each hieroglyph has a label above or to its right, showing what is depicted in the symbol, and what letter or letters it represents. At the top left is a forearm representing a. The hand is to the left and elbow to the right, with part of the upper arm shown above it. Down from this is the foot which represents b. It is a side view with the toes to the left and the heel to the right. Part of the lower leg is shown going up the page from the heel. At the bottom left there is a tethered rope symbol representing ch. It shows a rope which folds on the right and has two loops on the left. At the top centre of the page is the hand symbol which represents d. This shows a hand with the wrist to the right and the straight thumb and fingers to the left. Down from the hand is the vulture symbol which symbolises e. This is a side view of a vulture which faces to the left. One of its eyes can be found along with a curved beak. Its body is partially covered by a folded wing, and both legs are shown. Its tail droops towards the bottom right of the image. At the bottom centre is the pot stand symbol representing g. This is a side view with a line across the top and bottom of the shape, and a triangular opening in the bottom centre. In the top right corner is a rope symbol which represents h. The ends of the rope are at the bottom of the symbol. The rope is loosely twisted around itself, ending in a loop at the top. Down from the rope is the shelter symbol also representing h. It is like a simple floor plan with the entrance in the bottom left of the symbol and the walls shown as a thick line. At the bottom right of the page is the reed leaf symbol which represents i. The stem at the bottom of the symbol leads up to the blade-shaped leaf. Another nine Egyptian hieroglyphs: This page depicts nine more Egyptian hieroglyphs in three columns of three images. Each hieroglyph has a label above or to its right showing what is depicted in the symbol, and what letter or letters it represents. At the top left of the page is the cobra symbol representing j. The snake is viewed from the side, with its head at the top left, and long body curving down and right. Down from this is the basket symbol representing k. The basket is seen from the side, with four layers showing which get wider towards the top. A handle extends out to the right from the top layer. At the bottom left is the water symbol representing n. It is a thick zigzag line. At the top centre of the page is the stool symbol representing p. It is a view from above, looking down onto the stripe-patterned seat. Down from this is the folded cloth symbol representing s. It is a simple vertical line which curves back on itself at the top. At the bottom centre is the bread loaf symbol which represents t. The loaf is represented by a simple semi-circle. In the top right corner is the sieve symbol representing th. It is an open circle with horizontal lines. Down from this is the cow's belly symbol representing th. It has an oval at the right which is joined to a circle with six spikes at its left. At the bottom right is the door bolt symbol representing z. It is a long thin horizontal shape with two short vertical lines crossing it towards the middle.
Egyptian citizens (Large Print)
byIn this image showing Egyptian citizens, there is a man at the left of the page and a woman at the right. Both are standing and facing forwards so that all their facial features can be seen. A locator dot and title are shown. These must always be at the top left of the page when the image is the right way up.In the top left is the man's head, and he is smiling. He is wearing a simple headdress composed of a piece of cloth held in place by a band. Down the page are his bare shoulders and chest and he holds his arms out to the sides of his body. Around his waist he wears a simple linen loin cloth tied in place by a sash. Down from this are the man's bare legs and feet.The woman's head is at the top right. She also has a smiling face, and her long hair is held in place by a simple hair band. Around her shoulders she wears a large jewelled collar. Her bare arms are held out to the sides of her body, and she wears a bracelet on each wrist. Her full length linen dress reaches down to her ankles at the bottom of the page, and she wears plain leather sandals on her feet.