Special Collections
Romans (rotten or not!)
Description: Images and books to support project and theme based learning on Roman history.
- Table View
- List View
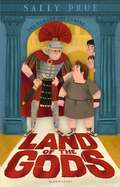
Land of the Gods
by Sally PrueA laugh-out-loud comedy from popular author Sally Prue, taking a light hearted look at the clash of cultures in Roman Britain. After all - who would live in a hut if there were underfloor heating on offer..."If they were Romans I was done for: they'd tear me apart, bit by bit, and enjoy doing it..."When Lucan sees a legion of Roman soldiers near his village it definitely makes sense to hide. But hiding in a wagon could prove to be a dangerous mistake. And falling asleep in the wagon is not the best idea that Lucan has ever had. Trapped as a Roman slave, can Lucan find his way home... and does he even want to?This hilarious book is packed with wonderful (and eccentric) characters and insight into life in Roman Britain.
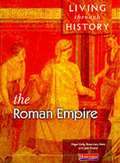
Living Through History
by Rosemary Rees and Jane Shuter and Nigel KellyLiving Through History is a complete Key Stage 3 course which brings out the exciting events in history. The course is available in two different editions, Core and Foundation. Every core title in the series has a parallel Foundation edition. Each Evaluation Pack includes the Assessment and Resource Pack and a free compendium volume student book. The resource packs include a variety of tasks which students should find interesting and enjoyable. They also include differentiated exercises to provide support for less able students and challenging work for more able students. Assessment exercises for the compulsory study units aim to help teachers monitor progress through NC levels.
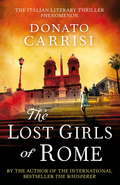
The Lost Girls of Rome
by Donato CarrisiA young girl has mysteriously disappeared in Rome. As rain lashes the ancient streets, two men, Clemente and Marcus, sit in a café near the Piazza Navona and pore over the details of the case. They are members of the ancient Penitenzeri - a unique Italian team, linked to the Vatican, and trained in the detection of true evil.But they are not alone. Sandra - a brilliant forensics expert with a tragic past - is also working on the case. When her path crosses theirs, not only do they make headway in the case of the missing girl, but they also uncover a terrible secret world, hidden in the dark recesses of Rome. A world that is as perfect as it is evil...A spellbinding literary thriller from the author of The Whisperer, this novel offers a window onto the hidden secrets of Rome. Beautifully capturing the atmosphere of the city, it blends a page-turning plot with fascinating historical fact.

Map of the Roman Empire, circa 150AD (Large Print)
by Rnib BookshareThis map shows the extent of the Roman Empire at this time. It is surrounded by an image border, and the countries have been marked by abbreviated letters. These can be referenced in the key that runs along the bottom of the page. There is a locator dot shown, which will be at the top left of the page when the image is the right way up. In the top right corner of the page there is a north arrow. Within the image border the un-textured areas represent the sea. The Roman Empire dominates countries around the centre of the map and surrounds the Mediterranean Sea. The Roman Empire itself was surrounded by other lands, which include Europe across the top section of the image and North Africa along the bottom section.
Map of the Roman Empire, circa 150AD (UEB contracted)
by RnibThis map shows the extent of the Roman Empire at this time. It is surrounded by an image border, and the countries have been marked by abbreviated letters. These can be referenced in the key that runs along the bottom of the page. There is a locator dot shown, which will be at the top left of the page when the image is the right way up. In the top right corner of the page there is a north arrow. Within the image border the un-textured areas represent the sea. The Roman Empire dominates countries around the centre of the map and surrounds the Mediterranean Sea. The Roman Empire itself was surrounded by other lands, which include Europe across the top section of the image and North Africa along the bottom section.
Map of the Roman Empire, circa 150AD (UEB Contracted)
by Rnib BookshareThis map shows the extent of the Roman Empire at this time. It is surrounded by an image border, and the countries have been marked by abbreviated letters. These can be referenced in the key that runs along the bottom of the page. There is a locator dot shown, which will be at the top left of the page when the image is the right way up. In the top right corner of the page there is a north arrow. Within the image border the un-textured areas represent the sea. The Roman Empire dominates countries around the centre of the map and surrounds the Mediterranean Sea. The Roman Empire itself was surrounded by other lands, which include Europe across the top section of the image and North Africa along the bottom section.
Map of the Roman Empire, circa 150AD (UEB Uncontracted)
by Rnib BookshareThis map shows the extent of the Roman Empire at this time. It is surrounded by an image border, and the countries have been marked by abbreviated letters. These can be referenced in the key that runs along the bottom of the page. There is a locator dot shown, which will be at the top left of the page when the image is the right way up. In the top right corner of the page there is a north arrow. Within the image border the un-textured areas represent the sea. The Roman Empire dominates countries around the centre of the map and surrounds the Mediterranean Sea. The Roman Empire itself was surrounded by other lands, which include Europe across the top section of the image and North Africa along the bottom section.
Map of the Roman Empire, circa 150AD (UEB uncontracted0
by RnibThis map shows the extent of the Roman Empire at this time. It is surrounded by an image border, and the countries have been marked by abbreviated letters. These can be referenced in the key that runs along the bottom of the page. There is a locator dot shown, which will be at the top left of the page when the image is the right way up. In the top right corner of the page there is a north arrow. Within the image border the un-textured areas represent the sea. The Roman Empire dominates countries around the centre of the map and surrounds the Mediterranean Sea. The Roman Empire itself was surrounded by other lands, which include Europe across the top section of the image and North Africa along the bottom section.
Map of the Roman Empire (large print)
by RnibThis map shows the extent of the Roman Empire at this time. It is surrounded by an image border, and the countries have been marked by abbreviated letters. These can be referenced in the key that runs along the bottom of the page. There is a locator dot shown, which will be at the top left of the page when the image is the right way up. In the top right corner of the page there is a north arrow. Within the image border the un-textured areas represent the sea. The Roman Empire dominates countries around the centre of the map and surrounds the Mediterranean Sea. The Roman Empire itself was surrounded by other lands, which include Europe across the top section of the image and North Africa along the bottom section.
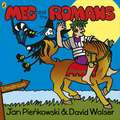
Meg and the Romans
by Jan PienkowskiMeg and Mog meet a new friend - a Roman who is in need of help! But will Meg's spell get him to London? Find out in this colourful new adventure and find out more about what Romans were really like...The Meg and Mog books have been entertaining children for nearly forty-five years; with their vibrant and unique artwork - they are perfect for sharing together, reading alone, and exploring the colours, shapes and characters in the pictures.
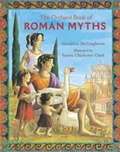
The Orchard Book of Roman Myths (PDF)
by Geraldine Mccaughrean and Emma Chichester ClarkA wonderfully rich and varied collection of fifteen stories from Roman mythology, retold for today's young readers. Here are all the famous myths from the birth of Venus, to the founding of Rome by Romulus and Remus. The great gods and goddesses, including Jupiter, Mars and Diana, are brought vividly to life by Emma Chichester Clark's beautiful illustrations that perfectly reflect the liveliness of Geraldine McCaughrean's gripping retellings.
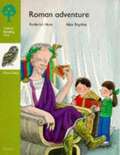
Oxford Reading Tree, Stage 7, More Owls
by Roderick HuntThe children go to Ancient Rome and learn about chariots and introduce the Roman's to pizza.
Oxford Reading Tree, Stage 7, More Owls
by Roderick HuntThe children go to Ancient Rome and learn about chariots and introduce the Roman's to pizza.
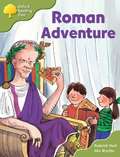
Oxford Reading Tree, Stage 7, More Storybooks (Magic Key)
by Roderick HuntBook band 7 turquoise. Oxford stage 7. The magic key sends Biff, Chip and Kipper back in time for a Roman adventure. Oxford Reading Tree remains the nation's favourite reading scheme and countless children have learnt to read with Biff, Chip, and Kipper. Alternate ISBN 9780198465881
Plan and side views of a Roman fort - Multi-page image (Large Print)
byThese images show two different views of a Roman fort. There is also a key on the first page. There is a locator dot shown on each page, which will be at the top left of the page when the image is the right way up. Plan view of a Roman fort: This image shows a plan of a fort surrounded by an image border on the right of the page and a key explaining the abbreviations and textures used on the two images of a Roman fort on the left of the page. There are four gatehouses in the plan, in the left (west gatehouse), top and bottom centre (north and south gatehouses), and on the right (east gatehouse). The arches which go over the road and link the two halves of the gatehouses are not shown. A central road runs from the left to right of the plan. Halfway along this road a second road runs down to the gatehouse at the bottom of the plan. On either side of this second road there are the barracks where the Roman soldiers would live. To the left of the barracks, resting against the outer wall are the toilets or Roman latrines. In the top half of the plan, up from the central road, are the other buildings of the fort. The Commander's House is to the left with an open central courtyard. Up and to the right are two workshops. To the right of these is a small square with a road leading up and out through the top centre gatehouse. Down from the courtyard is the Administrative Centre which is a large building also with a central courtyard. Right from the square are two store rooms or Roman granaries. Down from them are the stables and then two exercise yards on each side of the road.Side view of a Roman fort: There are two images on this page, at the top of the page there is a view of the fort from the west and at the bottom of the page there is a view of the fort from the east. On the left of the image at the top of the page there is the north gatehouse viewed from the side. One window can be found. To the right of the gatehouse is a section of the outer wall with crenellations (battlements). Behind this to the right is an end view of a workshop. To the right of this is the large building of the Commander's house with four columns. To the right of this is the west facing gatehouse with the arch over the road way. There would be two large wooden doors which could be closed to block the archway if the fort was being attacked. The gatehouse has two windows showing. To the right of this is another section of the outer wall. Behind this to the right is a side view of a barrack building. To the right of this is the south gatehouse viewed from the side. One window can be found. On the left of the image at the bottom of the page there is the south gatehouse viewed from the side. One window can be found. To the right of the gatehouse is a section of the outer wall with crenellations (battlements). Behind this to the right is the end view of three barrack buildings. To the right of this is the east facing gatehouse with the arch over the road way. There would be two large wooden doors which could be closed to block the archway if the fort was being attacked. The gatehouse has two windows showing. To the right of this is another section of the outer wall. Behind this to the right are the stables. To the right of this is an end view of a store room. To the right of this is the north gatehouse viewed from the side. One window can be found.
Plan and side views of a Roman fort - Multi-page image (UEB Contracted)
byThese images show two different views of a Roman fort. There is also a key on the first page. There is a locator dot shown on each page, which will be at the top left of the page when the image is the right way up. Plan view of a Roman fort: This image shows a plan of a fort surrounded by an image border on the right of the page and a key explaining the abbreviations and textures used on the two images of a Roman fort on the left of the page. There are four gatehouses in the plan, in the left (west gatehouse), top and bottom centre (north and south gatehouses), and on the right (east gatehouse). The arches which go over the road and link the two halves of the gatehouses are not shown. A central road runs from the left to right of the plan. Halfway along this road a second road runs down to the gatehouse at the bottom of the plan. On either side of this second road there are the barracks where the Roman soldiers would live. To the left of the barracks, resting against the outer wall are the toilets or Roman latrines. In the top half of the plan, up from the central road, are the other buildings of the fort. The Commander's House is to the left with an open central courtyard. Up and to the right are two workshops. To the right of these is a small square with a road leading up and out through the top centre gatehouse. Down from the courtyard is the Administrative Centre which is a large building also with a central courtyard. Right from the square are two store rooms or Roman granaries. Down from them are the stables and then two exercise yards on each side of the road.Side view of a Roman fort: There are two images on this page, at the top of the page there is a view of the fort from the west and at the bottom of the page there is a view of the fort from the east. On the left of the image at the top of the page there is the north gatehouse viewed from the side. One window can be found. To the right of the gatehouse is a section of the outer wall with crenellations (battlements). Behind this to the right is an end view of a workshop. To the right of this is the large building of the Commander's house with four columns. To the right of this is the west facing gatehouse with the arch over the road way. There would be two large wooden doors which could be closed to block the archway if the fort was being attacked. The gatehouse has two windows showing. To the right of this is another section of the outer wall. Behind this to the right is a side view of a barrack building. To the right of this is the south gatehouse viewed from the side. One window can be found. On the left of the image at the bottom of the page there is the south gatehouse viewed from the side. One window can be found. To the right of the gatehouse is a section of the outer wall with crenellations (battlements). Behind this to the right is the end view of three barrack buildings. To the right of this is the east facing gatehouse with the arch over the road way. There would be two large wooden doors which could be closed to block the archway if the fort was being attacked. The gatehouse has two windows showing. To the right of this is another section of the outer wall. Behind this to the right are the stables. To the right of this is an end view of a store room. To the right of this is the north gatehouse viewed from the side. One window can be found.
Plan and side views of a Roman fort - Multi-page image (UEB Uncontracted)
byThese images show two different views of a Roman fort. There is also a key on the first page. There is a locator dot shown on each page, which will be at the top left of the page when the image is the right way up. Plan view of a Roman fort: This image shows a plan of a fort surrounded by an image border on the right of the page and a key explaining the abbreviations and textures used on the two images of a Roman fort on the left of the page. There are four gatehouses in the plan, in the left (west gatehouse), top and bottom centre (north and south gatehouses), and on the right (east gatehouse). The arches which go over the road and link the two halves of the gatehouses are not shown. A central road runs from the left to right of the plan. Halfway along this road a second road runs down to the gatehouse at the bottom of the plan. On either side of this second road there are the barracks where the Roman soldiers would live. To the left of the barracks, resting against the outer wall are the toilets or Roman latrines. In the top half of the plan, up from the central road, are the other buildings of the fort. The Commander's House is to the left with an open central courtyard. Up and to the right are two workshops. To the right of these is a small square with a road leading up and out through the top centre gatehouse. Down from the courtyard is the Administrative Centre which is a large building also with a central courtyard. Right from the square are two store rooms or Roman granaries. Down from them are the stables and then two exercise yards on each side of the road.Side view of a Roman fort: There are two images on this page, at the top of the page there is a view of the fort from the west and at the bottom of the page there is a view of the fort from the east. On the left of the image at the top of the page there is the north gatehouse viewed from the side. One window can be found. To the right of the gatehouse is a section of the outer wall with crenellations (battlements). Behind this to the right is an end view of a workshop. To the right of this is the large building of the Commander's house with four columns. To the right of this is the west facing gatehouse with the arch over the road way. There would be two large wooden doors which could be closed to block the archway if the fort was being attacked. The gatehouse has two windows showing. To the right of this is another section of the outer wall. Behind this to the right is a side view of a barrack building. To the right of this is the south gatehouse viewed from the side. One window can be found. On the left of the image at the bottom of the page there is the south gatehouse viewed from the side. One window can be found. To the right of the gatehouse is a section of the outer wall with crenellations (battlements). Behind this to the right is the end view of three barrack buildings. To the right of this is the east facing gatehouse with the arch over the road way. There would be two large wooden doors which could be closed to block the archway if the fort was being attacked. The gatehouse has two windows showing. To the right of this is another section of the outer wall. Behind this to the right are the stables. To the right of this is an end view of a store room. To the right of this is the north gatehouse viewed from the side. One window can be found.
Plan of a Roman Bath House (large print)
by RnibThe image shows a plan of a typical Roman Bath House. There is a locator dot shown, which will be at the top left when the image is the correct way up. The entrance to the Bath House (aditus) is in the bottom right of the page. It is a small area with a door to the changing room (apodyterium) on the left. To the top right of the changing room is a door to a small storeroom. This is where the aromatic oils used in the bath house would be kept. To the top left of the changing room is a door to a small lobby area (vestibule) which is an entrance way into the baths from the changing rooms. Left from here is the cool room (frigidarium) with a cold pool. Up from the cool room is the warm room (tepidarium). There is a tepid pool here. To the right of this is a hot but normally dry room (laconicum). Up from the warm room is another hot room (caldarium), this time with a hot pool. This room usually has a cold fountain (labrum) as well. The water from the fountain is used to splash on the face for refreshment. Right from here is another hot room (alveus) with really hot baths. Not all bath houses have this type of room. Right from here is the furnace room (Praefurnium). This is where the fires to heat the rooms and baths are. There is a door into the room from the outside in the top left of the room. Notice that the nearer a room is to the furnace room the hotter it and its water is. Hot air is circulated under the floor and into wall cavities via channels (hypocausts), so the nearer a room is to the furnace the hotter this air will be. Only the three hot rooms have hot air wall spaces.
Plan of a Roman Bath House (UEB uncontracted)
by RnibThe image shows a plan of a typical Roman Bath House. There is a locator dot shown, which will be at the top left when the image is the correct way up. The entrance to the Bath House (aditus) is in the bottom right of the page. It is a small area with a door to the changing room (apodyterium) on the left. To the top right of the changing room is a door to a small storeroom. This is where the aromatic oils used in the bath house would be kept. To the top left of the changing room is a door to a small lobby area (vestibule) which is an entrance way into the baths from the changing rooms. Left from here is the cool room (frigidarium) with a cold pool. Up from the cool room is the warm room (tepidarium). There is a tepid pool here. To the right of this is a hot but normally dry room (laconicum). Up from the warm room is another hot room (caldarium), this time with a hot pool. This room usually has a cold fountain (labrum) as well. The water from the fountain is used to splash on the face for refreshment. Right from here is another hot room (alveus) with really hot baths. Not all bath houses have this type of room. Right from here is the furnace room (Praefurnium). This is where the fires to heat the rooms and baths are. There is a door into the room from the outside in the top left of the room. Notice that the nearer a room is to the furnace room the hotter it and its water is. Hot air is circulated under the floor and into wall cavities via channels (hypocausts), so the nearer a room is to the furnace the hotter this air will be. Only the three hot rooms have hot air wall spaces.

Rapid, Series 2, Stage 5, Set A
by Dee ReidScott and the Gladiator Scott looks in his old mirror and goes back to ancient Rome. When he finds himself fighting a gladiator, then a lion, he has to think fast to save himself and Marcus! Fight to the Death Julius lives in ancient Rome. He and his father are going to the Colosseum to watch gladiators fighting. Read about the fight and how the Emperor decides who wins! Part of the Rapid Reading series, created to help children catch up. Rapid Reading is the UK's most comprehensive reading intervention programme. The books and unique speech-recognition software are guaranteed to motivate children with SEN and struggling readers at Key Stage 2 (1st/2nd Level)
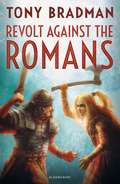
Revolt Against the Romans
by Tony Bradman"I've fought every kind of barbarian, but the Britons are by far the worst..."Marcus is excited about travelling to Britannia, the island at the edge of the world. But the Britons are savages who tattoo themselves and take the heads of their enemies in battle. They won't bow down to the rule of Rome. As Marcus travels to meet his father he meets a barbarian chief instead and his destiny is changed forever, along with that of Britannia...
Roman Chariot and horse (Large Print)
by Rnib BookshareThis image shows a side view of a horse harnessed to a chariot, which is being driven by a charioteer. The horse is on the right side of the page, with the chariot and charioteer on the left. There is a locator dot shown, which will be at the top left of the page when the image is the right way up. The horse is facing towards the right so only one ear, eye and nostril can be found. Its mouth is open and around its face it wears a bridle. Along the top of the horse's neck is its mane. At the base of the horse's neck, around its shoulders, is part of the harness of the chariot and the shaft which attaches to the chariot. Moving up from the shaft is the horse's body and tail, and moving down from the shaft are the horse's legs. This horse is trotting and is attached to the base of the chariot by the shaft to the left. In the bottom left of the image, one of the chariot's two wheels can be found. Up from this is the charioteer. He is heavily armoured. He holds both of his arms out in front of him towards the right and in his hand nearest the chariot he holds the horse's reins. These lead to the horses bridle. The charioteer's other hand is waving a whip. To the left is the charioteer's head, looking to the right, so only one eye can be found. He wears a metal helmet with decorative feathers along the top.
Roman Chariot and horse (UEB Contracted)
by Rnib BookshareThis image shows a side view of a horse harnessed to a chariot, which is being driven by a charioteer. The horse is on the right side of the page, with the chariot and charioteer on the left. There is a locator dot shown, which will be at the top left of the page when the image is the right way up. The horse is facing towards the right so only one ear, eye and nostril can be found. Its mouth is open and around its face it wears a bridle. Along the top of the horse's neck is its mane. At the base of the horse's neck, around its shoulders, is part of the harness of the chariot and the shaft which attaches to the chariot. Moving up from the shaft is the horse's body and tail, and moving down from the shaft are the horse's legs. This horse is trotting and is attached to the base of the chariot by the shaft to the left. In the bottom left of the image, one of the chariot's two wheels can be found. Up from this is the charioteer. He is heavily armoured. He holds both of his arms out in front of him towards the right and in his hand nearest the chariot he holds the horse's reins. These lead to the horses bridle. The charioteer's other hand is waving a whip. To the left is the charioteer's head, looking to the right, so only one eye can be found. He wears a metal helmet with decorative feathers along the top.
Roman Chariot and horse (UEB Uncontracted)
by Rnib BookshareThis image shows a side view of a horse harnessed to a chariot, which is being driven by a charioteer. The horse is on the right side of the page, with the chariot and charioteer on the left. There is a locator dot shown, which will be at the top left of the page when the image is the right way up. The horse is facing towards the right so only one ear, eye and nostril can be found. Its mouth is open and around its face it wears a bridle. Along the top of the horse's neck is its mane. At the base of the horse's neck, around its shoulders, is part of the harness of the chariot and the shaft which attaches to the chariot. Moving up from the shaft is the horse's body and tail, and moving down from the shaft are the horse's legs. This horse is trotting and is attached to the base of the chariot by the shaft to the left. In the bottom left of the image, one of the chariot's two wheels can be found. Up from this is the charioteer. He is heavily armoured. He holds both of his arms out in front of him towards the right and in his hand nearest the chariot he holds the horse's reins. These lead to the horses bridle. The charioteer's other hand is waving a whip. To the left is the charioteer's head, looking to the right, so only one eye can be found. He wears a metal helmet with decorative feathers along the top.