Special Collections
Saxons and Vikings
Description: Books and images for project and them based learning about Saxons and Vikings
- Table View
- List View
Saxon Tales
by Terry DearyKing Vortigern thinks he's so clever but his servant Mervyn knows he is playing a dangerous game. Can Mervyn keep the King safe from the invading Saxons, Pictish raiders, and a beautiful Saxon princess? Join master storyteller Terry Deary for a trip back in time to Saxon times and an exciting adventure.Book band: GreyIdeal for ages: 8+

Saxon Tales
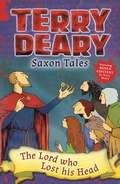
by Terry DearyIn Saxon Kent the law says thieves should be executed, and soup made from a stolen sheep has been found in the Medway house. Young Edward takes the blame, but does his father know more than he's letting on? And can he find a way to save his son from hanging?Join master storyteller Terry Deary for a trip back in time to Saxon times and an exciting adventure.Book band: BrownIdeal for ages: 7+
Saxon Tales
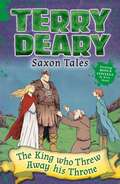
by Terry DearyIt's tough being a peasant in Saxon Britain. The taxes are too high, there are bandits everywhere, and rabbit porridge for dinner every night. Even worse, now the local thane, Lord Ethelbert, is plotting to take King Offa's throne, and the villagers are caught in the crossfire. Can clever young Marian keep the peace? More importantly, can she keep her head?Join master storyteller Terry Deary for a trip back in time to Saxon times and an exciting adventure.Book band: GreyIdeal for ages: 8+

Saxon Tales
by Terry DearyIt's tough being a peasant in Saxon Britain. The taxes are too high, there are bandits everywhere, and rabbit porridge for dinner every night. Even worse, now the local thane, Lord Ethelbert, is plotting to take King Offa's throne, and the villagers are caught in the crossfire. Can clever young Marian keep the peace? More importantly, can she keep her head?Join master storyteller Terry Deary for a trip back in time to Saxon times and an exciting adventure.Book band: GreyIdeal for ages: 8+
Saxon Tales
by Terry DearyIn Saxon Kent the law says thieves should be executed, and soup made from a stolen sheep has been found in the Medway house. Young Edward takes the blame, but does his father know more than he's letting on? And can he find a way to save his son from hanging?Join master storyteller Terry Deary for a trip back in time to Saxon times and an exciting adventure.Book band: BrownIdeal for ages: 7+

A Saxon Thane and a Norman Knight (large print)
by RnibThis is an image of a Saxon thane and a Norman knight. There is a locator dot shown, which will be at the top left of the page when the image is the right way up. The Saxon thane on the left of the page is facing you holding an axe in his right hand. He has lots of hair and a beard. He is wearing a tunic tied at the waist with a decorative pattern near the hem. Around his shoulders is a cloak fastened by a brooch on his right shoulder. He has strapping wrapped around his stockinged legs, which is part of his footwear. The Norman knight on the right of the page is also facing you, holding a sword in his hand to the left and is holding a large shield to the right. He is clean-shaven and has a steel helmet. He is wearing a knee-length chain mail tunic.
A Saxon Thane and a Norman Knight (UEB contracted)
by RnibThis is an image of a Saxon thane and a Norman knight. There is a locator dot shown, which will be at the top left of the page when the image is the right way up. The Saxon thane on the left of the page is facing you holding an axe in his right hand. He has lots of hair and a beard. He is wearing a tunic tied at the waist with a decorative pattern near the hem. Around his shoulders is a cloak fastened by a brooch on his right shoulder. He has strapping wrapped around his stockinged legs, which is part of his footwear. The Norman knight on the right of the page is also facing you, holding a sword in his hand to the left and is holding a large shield to the right. He is clean-shaven and has a steel helmet. He is wearing a knee-length chain mail tunic.
A Saxon Thane and a Norman Knight (UEB uncontracted)
by RnibThis is an image of a Saxon thane and a Norman knight. There is a locator dot shown, which will be at the top left of the page when the image is the right way up. The Saxon thane on the left of the page is facing you holding an axe in his right hand. He has lots of hair and a beard. He is wearing a tunic tied at the waist with a decorative pattern near the hem. Around his shoulders is a cloak fastened by a brooch on his right shoulder. He has strapping wrapped around his stockinged legs, which is part of his footwear. The Norman knight on the right of the page is also facing you, holding a sword in his hand to the left and is holding a large shield to the right. He is clean-shaven and has a steel helmet. He is wearing a knee-length chain mail tunic.
A scene from the Bayeux tapestry (large print)
by RnibThis page shows a section from the Bayeaux tapestry with two images of the death of King Harold. There is a locator dot shown, which will be at the top left of the page when the image is the right way up. On the left of the page is a soldier holding a shield with an arrow sticking out of it. King Harold is on the right of him shown pulling an arrow out of his eye. He is holding a spear and a large shield with three arrows sticking out of it. The shield has a big curved cross shape on it. On the right of the page is a Norman knight on a horse knocking King Harold down with his sword. Harold's axe is up in the air as he falls to the ground.
A scene from the Bayeux tapestry (UEB contracted)
by RnibThis page shows a section from the Bayeaux tapestry with two images of the death of King Harold. There is a locator dot shown, which will be at the top left of the page when the image is the right way up. On the left of the page is a soldier holding a shield with an arrow sticking out of it. King Harold is on the right of him shown pulling an arrow out of his eye. He is holding a spear and a large shield with three arrows sticking out of it. The shield has a big curved cross shape on it. On the right of the page is a Norman knight on a horse knocking King Harold down with his sword. Harold's axe is up in the air as he falls to the ground.
A scene from the Bayeux tapestry (UEB uncontracted)
by RnibThis page shows a section from the Bayeaux tapestry with two images of the death of King Harold. There is a locator dot shown, which will be at the top left of the page when the image is the right way up. On the left of the page is a soldier holding a shield with an arrow sticking out of it. King Harold is on the right of him shown pulling an arrow out of his eye. He is holding a spear and a large shield with three arrows sticking out of it. The shield has a big curved cross shape on it. On the right of the page is a Norman knight on a horse knocking King Harold down with his sword. Harold's axe is up in the air as he falls to the ground.
A Short History of the Normans
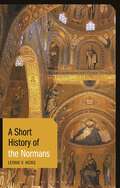
by Leonie V. HicksThe Battle of Hastings in 1066 is the one date forever seared on the British national psyche. It enabled the Norman Conquest that marked the end of Anglo-Saxon England. But there was much more to the Normans than the invading army Duke William shipped over from Normandy to the shores of Sussex. How a band of marauding warriors established some of the most powerful kingdoms in Europe – in Sicily and France, as well as England – is an improbably romantic idea. In exploring Norman culture in all its regions, Leonie V Hicks places the Normans in the context of early medieval society. Her comparative perspective enables the Norman story to be told in full, so that the societies of Rollo, William, Robert and Roger Guiscard are given the focused attention they deserve. From Hastings to the martial exploits of Bohemond and Tancred on the First Crusade; from castles and keeps to Romanesque cathedrals; and from the founding of the Kingdom of Sicily (1130) to cross-cultural encounters with Byzantines and Muslims, this is a fresh and lively survey of one of the most popular topics in European history.
Side view of a Norman catapult (Large Print)
byThis diagram shows a Norman catapult from the side, so that only two of its four wheels are visible. There is a locator dot shown, which will be at the top left of the page when the image is the right way up. The catapult is firing a projectile (a large rock) from the catapult arm. The catapult, the projectile and the direction of fire have been labelled. In the left centre of the page is the released retraction rope attached to a cup on the arm of the catapult. Slightly up from this is a projectile that is being released and is flying up and to the right. The arm extends to the right where it rotates around a pivot on the base. The arm continues further to the right where there is a counterweight basket hanging down the page from it. To the right of the basket there is an arrow pointing downward, showing its direction of travel. At the bottom of the page is the catapult's base with a wheel at the right and left.
Side view of a Norman catapult(UEB Contracted)
byThis diagram shows a Norman catapult from the side, so that only two of its four wheels are visible. There is a locator dot shown, which will be at the top left of the page when the image is the right way up. The catapult is firing a projectile (a large rock) from the catapult arm. The catapult, the projectile and the direction of fire have been labelled. In the left centre of the page is the released retraction rope attached to a cup on the arm of the catapult. Slightly up from this is a projectile that is being released and is flying up and to the right. The arm extends to the right where it rotates around a pivot on the base. The arm continues further to the right where there is a counterweight basket hanging down the page from it. To the right of the basket there is an arrow pointing downward, showing its direction of travel. At the bottom of the page is the catapult's base with a wheel at the right and left.
Side view of a Norman catapult (UEB Uncontracted)
byThis diagram shows a Norman catapult from the side, so that only two of its four wheels are visible. There is a locator dot shown, which will be at the top left of the page when the image is the right way up. The catapult is firing a projectile (a large rock) from the catapult arm. The catapult, the projectile and the direction of fire have been labelled. In the left centre of the page is the released retraction rope attached to a cup on the arm of the catapult. Slightly up from this is a projectile that is being released and is flying up and to the right. The arm extends to the right where it rotates around a pivot on the base. The arm continues further to the right where there is a counterweight basket hanging down the page from it. To the right of the basket there is an arrow pointing downward, showing its direction of travel. At the bottom of the page is the catapult's base with a wheel at the right and left.
The Smashing Saxons
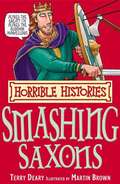
by Terry Deary and Martin BrownThe smashing Saxons were a rough tough bunch who liked nothing better than a bloody battle. They had great fun bashing the Brits... until they got nobbled by the Normans. Read on to shudder at the warlike ways of their pillaging people, and to find out... * who got cow pats as Christmas presents * why wearing a pig on your head was lucky * what disgusting diseases the Saxons suffered from * how to make a dead Saxon happy So read all about the savage Saxons. It's smashing fun!
Staffordshire hoard cross (large print)
by RnibThis page shows an image of a Christian cross. There is a locator dot shown, which will be at the top left of the page when the image is the correct way up. There is a front view of the cross in the centre of the page and a detail of the decoration in the bottom right of the page. The centre of the cross is set with a large garnet stone. The four arms of the cross have decorated arms. The ones to the left, right and up the page have a garnet stone set at the end. The rounded end has two small decorative œears. The arm going down the page is longer and has an oval garnet set in the middle. Three arms at the top each have one decorative panel. The long arm at the bottom has two panels. This arm widens at the end but does not have a garnet set in it. The detail to the right shows one of the decorative panels. There are two wide paths which intertwine twice. Two other thinner lines intertwine with the wide paths and each other. There is a decorative shape at the end of each wide path and four smaller shapes in the middle of the panel. There is a small piece of detailing at the bottom end of the panel. This is a reconstruction of the cross which was found folded up with two of the smaller garnets missing. The large stone was also missing so it is not certain it was a garnet, it may have been a rock crystal. The cross is 114 x 71 mm in size.
Staffordshire hoard cross (UEB contracted)
by RnibThis page shows an image of a Christian cross. There is a locator dot shown, which will be at the top left of the page when the image is the correct way up. There is a front view of the cross in the centre of the page and a detail of the decoration in the bottom right of the page. The centre of the cross is set with a large garnet stone. The four arms of the cross have decorated arms. The ones to the left, right and up the page have a garnet stone set at the end. The rounded end has two small decorative œears. The arm going down the page is longer and has an oval garnet set in the middle. Three arms at the top each have one decorative panel. The long arm at the bottom has two panels. This arm widens at the end but does not have a garnet set in it. The detail to the right shows one of the decorative panels. There are two wide paths which intertwine twice. Two other thinner lines intertwine with the wide paths and each other. There is a decorative shape at the end of each wide path and four smaller shapes in the middle of the panel. There is a small piece of detailing at the bottom end of the panel. This is a reconstruction of the cross which was found folded up with two of the smaller garnets missing. The large stone was also missing so it is not certain it was a garnet, it may have been a rock crystal. The cross is 114 x 71 mm in size.
Staffordshire hoard cross (UEB uncontracted)
by RnibThis page shows an image of a Christian cross. There is a locator dot shown, which will be at the top left of the page when the image is the correct way up. There is a front view of the cross in the centre of the page and a detail of the decoration in the bottom right of the page. The centre of the cross is set with a large garnet stone. The four arms of the cross have decorated arms. The ones to the left, right and up the page have a garnet stone set at the end. The rounded end has two small decorative œears. The arm going down the page is longer and has an oval garnet set in the middle. Three arms at the top each have one decorative panel. The long arm at the bottom has two panels. This arm widens at the end but does not have a garnet set in it. The detail to the right shows one of the decorative panels. There are two wide paths which intertwine twice. Two other thinner lines intertwine with the wide paths and each other. There is a decorative shape at the end of each wide path and four smaller shapes in the middle of the panel. There is a small piece of detailing at the bottom end of the panel. This is a reconstruction of the cross which was found folded up with two of the smaller garnets missing. The large stone was also missing so it is not certain it was a garnet, it may have been a rock crystal. The cross is 114 x 71 mm in size.
Staffordshire hoard scabbard boss (large print)
by RnibThis page shows an image of a scabbard boss. There is a locator dot shown, which will be at the top left of the page when the image is the correct way up. There is a face-up view of the boss in the centre of the page and a profile shape in the bottom of the page. The scabbard boss is round, domed and made from gold. It has four pieces of garnet inset in the centre. They are two pairs of shapes, the opposites are nearly identical. The angular shapes neatly interlock. In a ring around them are ten rounded pieces of garnet. They are alternately an oval and a heart shaped piece. Around the garnet shapes is ring with a circular line of small gold bumps. The boss is a decorative button on a scabbard (sheath). The boss is 41 x 18.5 mm in size.
Staffordshire hoard scabbard boss (UEB contracted)
by RnibThis page shows an image of a scabbard boss. There is a locator dot shown, which will be at the top left of the page when the image is the correct way up. There is a face-up view of the boss in the centre of the page and a profile shape in the bottom of the page. The scabbard boss is round, domed and made from gold. It has four pieces of garnet inset in the centre. They are two pairs of shapes, the opposites are nearly identical. The angular shapes neatly interlock. In a ring around them are ten rounded pieces of garnet. They are alternately an oval and a heart shaped piece. Around the garnet shapes is ring with a circular line of small gold bumps. The boss is a decorative button on a scabbard (sheath). The boss is 41 x 18.5 mm in size.
Staffordshire hoard scabbard boss (UEB uncontracted)
by RnibThis page shows an image of a scabbard boss. There is a locator dot shown, which will be at the top left of the page when the image is the correct way up. There is a face-up view of the boss in the centre of the page and a profile shape in the bottom of the page. The scabbard boss is round, domed and made from gold. It has four pieces of garnet inset in the centre. They are two pairs of shapes, the opposites are nearly identical. The angular shapes neatly interlock. In a ring around them are ten rounded pieces of garnet. They are alternately an oval and a heart shaped piece. Around the garnet shapes is ring with a circular line of small gold bumps. The boss is a decorative button on a scabbard (sheath). The boss is 41 x 18.5 mm in size.
Staffordshire hoard seahorse (large print)
by RnibThis page shows an image of a gold seahorse. There is a locator dot shown, which will be at the top left of the page when the image is the correct way up. There is a side view of the seahorse facing to the right in the centre left of the page and a detail of the decoration in the bottom right of the page in an image border. The seahorse is flat with extremely fine filigree decorations made from very thin gold wire. The seahorse's head is in the top centre of the page. An ear sticks up with an eye down from it. The snout goes down and right. The body curves left, down and right to a point. It then goes down and left again. It curves to the right ending in a damaged edge where some part appears missing. A small section to the bottom left could perhaps be a fin which has a hole in it. Five wires run down the body, one along the left edge, one along the right edge and three spaced down the middle dividing the body into four strips. The strips are decorated with tiny wire circular spirals. The detail shows the spiral patterns. The spirals are in linked pairs so that one spiral flows into the other half. Most of the spirals run in a clockwise direction but one of the central strips has anti-clockwise spirals. The seahorse is quite small, only 41 x 18.5 mm in size. Three of the spirals together are the size of a grain of rice!
Staffordshire hoard seahorse (UEB contracted)
by RnibThis page shows an image of a gold seahorse. There is a locator dot shown, which will be at the top left of the page when the image is the correct way up. There is a side view of the seahorse facing to the right in the centre left of the page and a detail of the decoration in the bottom right of the page in an image border. The seahorse is flat with extremely fine filigree decorations made from very thin gold wire. The seahorse's head is in the top centre of the page. An ear sticks up with an eye down from it. The snout goes down and right. The body curves left, down and right to a point. It then goes down and left again. It curves to the right ending in a damaged edge where some part appears missing. A small section to the bottom left could perhaps be a fin which has a hole in it. Five wires run down the body, one along the left edge, one along the right edge and three spaced down the middle dividing the body into four strips. The strips are decorated with tiny wire circular spirals. The detail shows the spiral patterns. The spirals are in linked pairs so that one spiral flows into the other half. Most of the spirals run in a clockwise direction but one of the central strips has anti-clockwise spirals. The seahorse is quite small, only 41 x 18.5 mm in size. Three of the spirals together are the size of a grain of rice!
Staffordshire hoard seahorse (UEB uncontracted)
by RnibThis page shows an image of a gold seahorse. There is a locator dot shown, which will be at the top left of the page when the image is the correct way up. There is a side view of the seahorse facing to the right in the centre left of the page and a detail of the decoration in the bottom right of the page in an image border. The seahorse is flat with extremely fine filigree decorations made from very thin gold wire. The seahorse's head is in the top centre of the page. An ear sticks up with an eye down from it. The snout goes down and right. The body curves left, down and right to a point. It then goes down and left again. It curves to the right ending in a damaged edge where some part appears missing. A small section to the bottom left could perhaps be a fin which has a hole in it. Five wires run down the body, one along the left edge, one along the right edge and three spaced down the middle dividing the body into four strips. The strips are decorated with tiny wire circular spirals. The detail shows the spiral patterns. The spirals are in linked pairs so that one spiral flows into the other half. Most of the spirals run in a clockwise direction but one of the central strips has anti-clockwise spirals. The seahorse is quite small, only 41 x 18.5 mm in size. Three of the spirals together are the size of a grain of rice!