Special Collections
World War 2
Description: books and accessible images to support themed learning about World War 2.
- Table View
- List View

Vulcan - Long-range Medium Bomber (UEB uncontracted)
by RnibThis is an image of a jet bomber seen from above. There is a locator dot shown, which will be at the top left of the page when the image is the correct way up. The image is in the centre and a scale in metres on the left of the page. The aircraft nose is in the top centre and the tail in the bottom centre of the page. The fuselage goes up and down the middle of the page. The cockpit is shown as a tiny window near the nose. The wings sweep down to the left and right and are widest at the tail end. Sticking out from the end of the aircraft there are two jet engine nozzles to the left and right of the tail. The bottom edge of the wing has four flaps on each side, these are the ailerons used to manoeuvre the aircraft when it is flying.
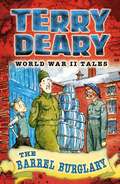
World War II Tales
by Terry Deary and James De RueStories of the Second World War on the Home Front from the bestselling Terry Deary, author of the hugely successful Horrible Histories. A young tearaway unwillingly evacuated to the countryside is unjustly accused of theft. He decides to make his way back home, never mind the Blitz - but he'll need to steal a bike to do it...
Avro Lancaster Bomber (large print)
by RnibThis page shows two images of an aircraft. At the top of the page seen from the side and in the bottom and middle of the page a plan view seen from above. There is a locator dot shown, which will be at the top left of the page when the image is the correct way up. Both views have the front on the left and the tail on the right of the page. The aircraft is shown in a flying position so the front wheels are retracted and not shown. The aircraft in the top of the page has a transparent nose cone on the left which is where the bomb aimer sits. Up and right from this is the fore gunner's turret. Up and right from this again is the main cockpit cover. Down from the cockpit are two propellers. They are attached to engines which hang off the wing. To the right of the propellers is a small rectangle which comprises six exhaust outlets on the outer side of the outside engine. Right from the exhaust is the tip of the wing pointing towards you. The centre of the fuselage has letters identifying which individual aircraft it is. There is also a red and blue roundel indicating the plane belongs to the RAF. On the top edge of the fuselage there is a gun turret with the gun pointing up and to the right. Right of this the fuselage continues to one of the vertical tail fins. On the right of this is a vertical flap. This is one of the ailerons used to manoeuvre the aircraft when it is flying. The tail has a red rectangle and a blue rectangle separated by a white line indicating the plane belongs to the RAF. Down from the tail fin is the single rear wheel. To the right of the tail is the rear gun turret with the gun pointing right and down. In the plan view image in the bottom and middle of the page the fuselage goes from left to right in the centre of the image. The main wings go up and down the page from the fuselage. On the left the fuselage starts with a transparent nose cone which is where the bomb aimer sits. Right from this is the fore gunner's turret. Its guns cross above the bomb aimer. Right from this is the main cockpit cover. There are two small hatches in the centre of the fuselage and right from them is a gun turret with the guns pointing to the right. The fuselage finishes on the right with the rear gun turret with the guns pointing to the right. In the centre of the page the main wings each have two engines and propellers sticking out to the left. To the right of the propellers six exhaust outlets can be found on the top and bottom edge of each engine. Towards the end of each wing is a red and blue roundel indicating the plane belongs to the RAF. On the right of each wing tip is a flap. These are two of the ailerons used to manoeuvre the aircraft when it is flying. On the right of the page is the tailplane. The right half of each tail wing is a flap. These are two more of the ailerons used to manoeuvre the aircraft when it is flying. The ends of the tail wing, up and down the page have the ends of the two vertical fins showing. The plane is green although it was also commonly painted with camouflage colours. The underside is dark grey or black. This would mean the aircraft was difficult to detect from the ground when out on night bombing raids.
World War II
by Sir Tony RobinsonWinner of Best Books with Facts in the 2013 Blue Peter awards, voted for by children.In Sir Tony Robinson's Weird World of Wonders World War II, Sir Tony Robinson takes you on a headlong gallop through time, pointing out all the most important, funny, strange, amazing, entertaining, smelly and disgusting bits about World War II! It's history, but not as we know it!Find out everything you need to know in this brilliant, action-packed, fact-filled book, including:- Just how useful mashed potato is- How the Battle of Britain was won- What it takes to be a spy- How D-Day was kept a surpriseFor more World War history facts in this fun series, discover World War I.

Danny Baker Record Breaker
by Steve HartleyLike many young boys, Danny dreams of making it into the record books. Eternally optimistic, he writes to Mr Bibby, Keeper of the Records, with hilarious accounts of his yucky endeavours. In this book, Danny is going on holiday! He will attempt to break the following records. Drumroll, please. . . Sickbags filled in a single flight! (DB attempt: 13) Wriggliest bath! (DB attempt: 9,183 worms) Freckliest face! (DB attempt: 1,246 freckles - before sabotage by Mum and the Factor 5,000,000 suncream)
Avro Lancaster Bomber (UEB contracted)
by RnibThis page shows two images of an aircraft. At the top of the page seen from the side and in the bottom and middle of the page a plan view seen from above. There is a locator dot shown, which will be at the top left of the page when the image is the correct way up. Both views have the front on the left and the tail on the right of the page. The aircraft is shown in a flying position so the front wheels are retracted and not shown. The aircraft in the top of the page has a transparent nose cone on the left which is where the bomb aimer sits. Up and right from this is the fore gunner's turret. Up and right from this again is the main cockpit cover. Down from the cockpit are two propellers. They are attached to engines which hang off the wing. To the right of the propellers is a small rectangle which comprises six exhaust outlets on the outer side of the outside engine. Right from the exhaust is the tip of the wing pointing towards you. The centre of the fuselage has letters identifying which individual aircraft it is. There is also a red and blue roundel indicating the plane belongs to the RAF. On the top edge of the fuselage there is a gun turret with the gun pointing up and to the right. Right of this the fuselage continues to one of the vertical tail fins. On the right of this is a vertical flap. This is one of the ailerons used to manoeuvre the aircraft when it is flying. The tail has a red rectangle and a blue rectangle separated by a white line indicating the plane belongs to the RAF. Down from the tail fin is the single rear wheel. To the right of the tail is the rear gun turret with the gun pointing right and down. In the plan view image in the bottom and middle of the page the fuselage goes from left to right in the centre of the image. The main wings go up and down the page from the fuselage. On the left the fuselage starts with a transparent nose cone which is where the bomb aimer sits. Right from this is the fore gunner's turret. Its guns cross above the bomb aimer. Right from this is the main cockpit cover. There are two small hatches in the centre of the fuselage and right from them is a gun turret with the guns pointing to the right. The fuselage finishes on the right with the rear gun turret with the guns pointing to the right. In the centre of the page the main wings each have two engines and propellers sticking out to the left. To the right of the propellers six exhaust outlets can be found on the top and bottom edge of each engine. Towards the end of each wing is a red and blue roundel indicating the plane belongs to the RAF. On the right of each wing tip is a flap. These are two of the ailerons used to manoeuvre the aircraft when it is flying. On the right of the page is the tailplane. The right half of each tail wing is a flap. These are two more of the ailerons used to manoeuvre the aircraft when it is flying. The ends of the tail wing, up and down the page have the ends of the two vertical fins showing. The plane is green although it was also commonly painted with camouflage colours. The underside is dark grey or black. This would mean the aircraft was difficult to detect from the ground when out on night bombing raids.

World War II Tales
by Terry Deary and James De RueStories of the Second World War on the Home Front from the bestselling Terry Deary, author of the hugely successful Horrible Histories. A story of the old soldiers who made up the Home Guard, and the young people who helped them. The Home Guard of a small town need supplies but the local factory owner won't help. So they decide to use unconventional methods...
World War II evacuee children (large print)
by RnibThis page shows an image of three small children. There is a locator dot shown, which will be at the top left of the page when the image is the correct way up. The children are shown standing facing forwards so both their arms, legs, eyes and ears can be found. There is a girl on the left, a boy in the middle and a smaller girl on the right. They each wear a luggage label which says their name and where they are being evacuated to. The girl on the left wears a short orange coat and a pink bonnet. She has a white box containing her gas mask hanging on a string around her neck. She has short pale grey socks and red sandals. The boy in the middle wears a brown cap and a very short grey coat. He has long grey socks which are wrinkled as they are falling down. He wears brown shoes and his gas mask box is on the ground to the left of them and rhere is a suitcase ti the right of them. The girl on the right wears a light purple coat to below her knees. On her head she has a small brown hat. She also has a white box containing her gas mask hanging on a string around her neck. She wears short pale grey socks and brown shoes.
World War II Japanese foot soldier (UEB uncontracted)
by RnibThis page shows an image of a soldier. There is a locator dot shown, which will be at the top left of the page when the image is the correct way up. The man is shown standing, from the front but with the head turned to the left so both arms and legs but only one eye and ear can be found. He wears a sand coloured uniform. He has a peaked cloth cap with a leather headband to the front. At the back there is a cloth flap to protect his neck from the sun. His jacket has the flaps with buttons to two breast pockets showing. There is a leather strap going from the shoulder on the left to the waist on the right and another going from the shoulder on the right to the waist on the left. He has a leather belt with a sword and sheath attached. Only the handle and top part of the sheath is shown. His arms are straight and held out to the left and right. He wears baggy breeches to just below the knee. The lower legs are wrapped with cloth which is held in place with straps. He has lightweight boots on his feet.
World War II German foot soldier (large print)
by RnibThis page shows an image of a soldier. There is a locator dot shown, which will be at the top left of the page when the image is the correct way up. The man is shown standing, from the front but with the head turned to the left so both arms and legs but only one eye and ear can be found. He wears a grey coloured uniform. He has a metal helmet on his head. His jacket has the flaps with buttons to two breast and two waist pockets showing. There is a decorative motive on each collar flap. Up from the breast pocket on the left there is the German military badge which is made from a bird and a swastika. There is a leather strap going from the shoulder on the left to the waist on the right. He has a leather belt with four leather pouches on it. His arms are straight and held out to the left and right. He wears trousers to just below the knee. He has long black leather boots on his feet.
World War II
by Robert FowkeDid you know that Adolf Hilter wasn't, in fact, German?The Second World War brought horror and heartache to millions of people all over the globe, and it turned everyday living upside down too. Any history book will give you the boring facts THEY think you should know, but only this one will tell you what life during World War II was REALLY like ...
JU 87 Stuka Dive Bomber (UEB contracted)
by RnibThis page shows two images of an aircraft. At the top of the page seen from the side and in the bottom and middle of the page a plan view seen from above. There is a locator dot shown, which will be at the top left of the page when the image is the correct way up. Both views have the front on the left and the tail on the right of the page. The aircraft is shown in a flying position. The aircraft in the top of the page has the propeller on the left with one blade pointing up and one pointing down. The tip of the nose cone is yellow on the large print image. Up and right there is a notch in the fuselage, this is the air intake for the engine. Down from this is a rectangle which comprises six exhaust outlets. The bottom left of the front of the aircraft nose has a notch. This is the air intake for the radiator. To the right, down from the exhaust, are outlets for hot air to escape. In the top centre of the image is the cockpit cover. It has an aerial sticking up. Poking up and right is a gun the rear gunner would use if the aircraft was attacked. Down from the cockpit is the wingtip and mainly underside of the wing. The wings on this aircraft are angled down a short way as they leave the fuselage. They then kink upwards towards the tip of the wing, allowing the underside to be found. One of the two front wheels is shown down from the wing. The wheel is largely hidden by the streamlined wheel cover. A single large bomb is attached under the cockpit between the wheels. The leg of the wheel hides the central part of the bomb. Right of the wing the fuselage continues to the vertical tail fin on the right. In the centre of this section is a cross identifying the plane as German. In the centre of the fin is the end of one of the tail wings. Right of this is a vertical flap. This is one of the ailerons used to manoeuvre the aircraft when it is flying. Down from the fin is the single small tail wheel. In the plan view image in the bottom and middle of the page the fuselage goes from left to right in the centre of the image. The main wings go up and down the page from the fuselage. In the left of the page the propeller has one blade pointing up and one pointing down. The tip of the nose cone is yellow on the large print image. To the right of the propeller six exhaust outlets can be found on the top and bottom edge of the fuselage. Right of this are the wings. On the wings near the fuselage there is a horizontal line which is where the wing kinks. Towards the tips of each wing there is a cross identifying the plane as German. The trailing edge of the wings on the right has flaps which are the automatic airbrakes used to take the aircraft out of a dive so it does not crash. In the centre of the fuselage between the wings is the cockpit. The fuselage continues to the right ending in the tailplane. On the right of each tail wing is a flap. These are two of the ailerons used to manoeuvre the aircraft when it is flying.
Run, Spy, Run!
by Craig SimpsonA British secret agent is photographing top secret German files when he is unexpectedly interrupted, and the alarm is raised. What follows is a desperate battle for survival as Jaques is pursued, hiding where he can and not able to trust anyone. He must find a path out of Occupied France to get the camera and film into British hands, nothing else - not even his own life - matters.This title is published by Franklin Watts EDGE, which produces a range of books to get children reading with confidence. EDGE - for books kids can't put down.
JU 87 Stuka Dive Bomber (large print)
by RnibThis page shows two images of an aircraft. At the top of the page seen from the side and in the bottom and middle of the page a plan view seen from above. There is a locator dot shown, which will be at the top left of the page when the image is the correct way up. Both views have the front on the left and the tail on the right of the page. The aircraft is shown in a flying position. The aircraft in the top of the page has the propeller on the left with one blade pointing up and one pointing down. The tip of the nose cone is yellow on the large print image. Up and right there is a notch in the fuselage, this is the air intake for the engine. Down from this is a rectangle which comprises six exhaust outlets. The bottom left of the front of the aircraft nose has a notch. This is the air intake for the radiator. To the right, down from the exhaust, are outlets for hot air to escape. In the top centre of the image is the cockpit cover. It has an aerial sticking up. Poking up and right is a gun the rear gunner would use if the aircraft was attacked. Down from the cockpit is the wingtip and mainly underside of the wing. The wings on this aircraft are angled down a short way as they leave the fuselage. They then kink upwards towards the tip of the wing, allowing the underside to be found. One of the two front wheels is shown down from the wing. The wheel is largely hidden by the streamlined wheel cover. A single large bomb is attached under the cockpit between the wheels. The leg of the wheel hides the central part of the bomb. Right of the wing the fuselage continues to the vertical tail fin on the right. In the centre of this section is a cross identifying the plane as German. In the centre of the fin is the end of one of the tail wings. Right of this is a vertical flap. This is one of the ailerons used to manoeuvre the aircraft when it is flying. Down from the fin is the single small tail wheel. In the plan view image in the bottom and middle of the page the fuselage goes from left to right in the centre of the image. The main wings go up and down the page from the fuselage. In the left of the page the propeller has one blade pointing up and one pointing down. The tip of the nose cone is yellow on the large print image. To the right of the propeller six exhaust outlets can be found on the top and bottom edge of the fuselage. Right of this are the wings. On the wings near the fuselage there is a horizontal line which is where the wing kinks. Towards the tips of each wing there is a cross identifying the plane as German. The trailing edge of the wings on the right has flaps which are the automatic airbrakes used to take the aircraft out of a dive so it does not crash. In the centre of the fuselage between the wings is the cockpit. The fuselage continues to the right ending in the tailplane. On the right of each tail wing is a flap. These are two of the ailerons used to manoeuvre the aircraft when it is flying.
World War II bombed street (UEB contracted)
by RnibThis page shows an image of bomb damaged houses surrounded by an image border. There is a locator dot shown, which will be at the top left of the page when the image is the correct way up. There are three terraced houses and an old fashioned lamp post. The house in the middle is nearly completely destroyed. Only part of a window with broken glass remains to the left of the open doorway. The lamp post is in front of this house and leans precariously to the left. The house on the left is only damaged upstairs. Some of the roof slates have been blown off exposing some of the roof timber. Some of the wall to the room above the front door is missing. The house on the right is damaged upstairs and downstairs. Lots of the roof slates have been blown off also exposing some of the roof timber. The left upstairs window is half missing with broken glass. Most of this room is missing. The downstairs room is half missing. Its window is intact although the glass is cracked. To the right the front door and the window above are not damaged.
JU 87 Stuka Dive Bomber (UEB uncontracted)
by RnibThis page shows two images of an aircraft. At the top of the page seen from the side and in the bottom and middle of the page a plan view seen from above. There is a locator dot shown, which will be at the top left of the page when the image is the correct way up. Both views have the front on the left and the tail on the right of the page. The aircraft is shown in a flying position. The aircraft in the top of the page has the propeller on the left with one blade pointing up and one pointing down. The tip of the nose cone is yellow on the large print image. Up and right there is a notch in the fuselage, this is the air intake for the engine. Down from this is a rectangle which comprises six exhaust outlets. The bottom left of the front of the aircraft nose has a notch. This is the air intake for the radiator. To the right, down from the exhaust, are outlets for hot air to escape. In the top centre of the image is the cockpit cover. It has an aerial sticking up. Poking up and right is a gun the rear gunner would use if the aircraft was attacked. Down from the cockpit is the wingtip and mainly underside of the wing. The wings on this aircraft are angled down a short way as they leave the fuselage. They then kink upwards towards the tip of the wing, allowing the underside to be found. One of the two front wheels is shown down from the wing. The wheel is largely hidden by the streamlined wheel cover. A single large bomb is attached under the cockpit between the wheels. The leg of the wheel hides the central part of the bomb. Right of the wing the fuselage continues to the vertical tail fin on the right. In the centre of this section is a cross identifying the plane as German. In the centre of the fin is the end of one of the tail wings. Right of this is a vertical flap. This is one of the ailerons used to manoeuvre the aircraft when it is flying. Down from the fin is the single small tail wheel. In the plan view image in the bottom and middle of the page the fuselage goes from left to right in the centre of the image. The main wings go up and down the page from the fuselage. In the left of the page the propeller has one blade pointing up and one pointing down. The tip of the nose cone is yellow on the large print image. To the right of the propeller six exhaust outlets can be found on the top and bottom edge of the fuselage. Right of this are the wings. On the wings near the fuselage there is a horizontal line which is where the wing kinks. Towards the tips of each wing there is a cross identifying the plane as German. The trailing edge of the wings on the right has flaps which are the automatic airbrakes used to take the aircraft out of a dive so it does not crash. In the centre of the fuselage between the wings is the cockpit. The fuselage continues to the right ending in the tailplane. On the right of each tail wing is a flap. These are two of the ailerons used to manoeuvre the aircraft when it is flying.
World War II bombed street (UEB uncontracted)
by RnibThis page shows an image of bomb damaged houses surrounded by an image border. There is a locator dot shown, which will be at the top left of the page when the image is the correct way up. There are three terraced houses and an old fashioned lamp post. The house in the middle is nearly completely destroyed. Only part of a window with broken glass remains to the left of the open doorway. The lamp post is in front of this house and leans precariously to the left. The house on the left is only damaged upstairs. Some of the roof slates have been blown off exposing some of the roof timber. Some of the wall to the room above the front door is missing. The house on the right is damaged upstairs and downstairs. Lots of the roof slates have been blown off also exposing some of the roof timber. The left upstairs window is half missing with broken glass. Most of this room is missing. The downstairs room is half missing. Its window is intact although the glass is cracked. To the right the front door and the window above are not damaged.
Wellington Square, Level 3, Set A
by Tessa KrailingPart of a series of stories and activities centred on a real neighbourhood, Wellington Square, and the people who live there. From Level 3 onwards, the stories also contain supplementary materials and suggestions dealing with non-fiction texts.
Vulcan - Long-range Medium Bomber (UEB contracted)
by RnibThis is an image of a jet bomber seen from above. There is a locator dot shown, which will be at the top left of the page when the image is the correct way up. The image is in the centre and a scale in metres on the left of the page. The aircraft nose is in the top centre and the tail in the bottom centre of the page. The fuselage goes up and down the middle of the page. The cockpit is shown as a tiny window near the nose. The wings sweep down to the left and right and are widest at the tail end. Sticking out from the end of the aircraft there are two jet engine nozzles to the left and right of the tail. The bottom edge of the wing has four flaps on each side, these are the ailerons used to manoeuvre the aircraft when it is flying.
World War II German doodlebug (UEB uncontracted)
by RnibThis page shows two images of the flying bomb, the V1 nicknamed doodlebug. At the top of the page seen from the side and in the bottom and middle of the page a plan view seen from above. There is a locator dot shown, which will be at the top left of the page when the image is the correct way up. Both views have the front on the left and the tail on the right of the page. In the top side view the body of the flying bomb is fatter on the left than the right. It is very streamlined. Halfway along the body the end of the wing can be found. It is angled up slightly to give the bomb lift when it flies. The pulse jet engine on the right is mounted onto the top of the bomb by two brackets. The end of the engine on the left is for air intake and the end on the right is the exhaust thrust. In the plan view image in the bottom and middle of the page the body of the bomb goes from left to right in the centre of the image. The wings go up and down the page from the body. On each wing there is a German cross indicating the bomb belongs to the Luftwaffe. The upper surface is green although sometimes camouflage colours were used so it was difficult to spot from the air. The underneath colour is a pale sky colour so it would be difficult to spot from the ground when flying.
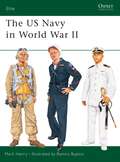
The US Navy in World War II
by Ramiro Bujeiro and Mark HenryIn 1941 the US Navy had 17 battleships of which eight would be knocked out on the first day of the war four aircraft carriers, and about 340,000 men including reservists. Pearl Harbor so weakened it that it was unable to prevent the Japanese capture of the Philippines and a vast sweep of Pacific islands. By 1945 it was the strongest navy the world had ever seen, with nearly 100 carriers, 41,000 aircraft and 3.3 million men; the unrivalled master of air-sea and amphibious operations, it was poised to invade Japan's home islands after reducing her fleet to scrap and her Pacific empire to impotence and starvation. This extraordinary story is illustrated here with dramatic photos, and nine meticulous colour plates showing a wide range of USN uniforms.
Wellington Square, Level 3, Set A
by Tessa KrailingPart of a series of stories and activities centred on a real neighbourhood, Wellington Square, and the people who live there. From Level 3 onwards, the stories also contain supplementary materials and suggestions dealing with non-fiction texts.
Vulcan - Long-range Medium Bomber (large print)
by RnibThis is an image of a jet bomber seen from above. There is a locator dot shown, which will be at the top left of the page when the image is the correct way up. The image is in the centre and a scale in metres on the left of the page. The aircraft nose is in the top centre and the tail in the bottom centre of the page. The fuselage goes up and down the middle of the page. The cockpit is shown as a tiny window near the nose. The wings sweep down to the left and right and are widest at the tail end. Sticking out from the end of the aircraft there are two jet engine nozzles to the left and right of the tail. The bottom edge of the wing has four flaps on each side, these are the ailerons used to manoeuvre the aircraft when it is flying.
World War II Tales
by Terry Deary and James De RueStories of the Second World War on the Home Front from the bestselling Terry Deary, author of the hugely successful Horrible Histories. A story of the old soldiers who made up the Home Guard, and the young people who helped them. The Home Guard of a small town need supplies but the local factory owner won't help. So they decide to use unconventional methods...

Run, Spy, Run!
by Craig SimpsonA British secret agent is photographing top secret German files when he is unexpectedly interrupted, and the alarm is raised. What follows is a desperate battle for survival as Jaques is pursued, hiding where he can and not able to trust anyone. He must find a path out of Occupied France to get the camera and film into British hands, nothing else - not even his own life - matters.This title is published by Franklin Watts EDGE, which produces a range of books to get children reading with confidence. EDGE - for books kids can't put down.